
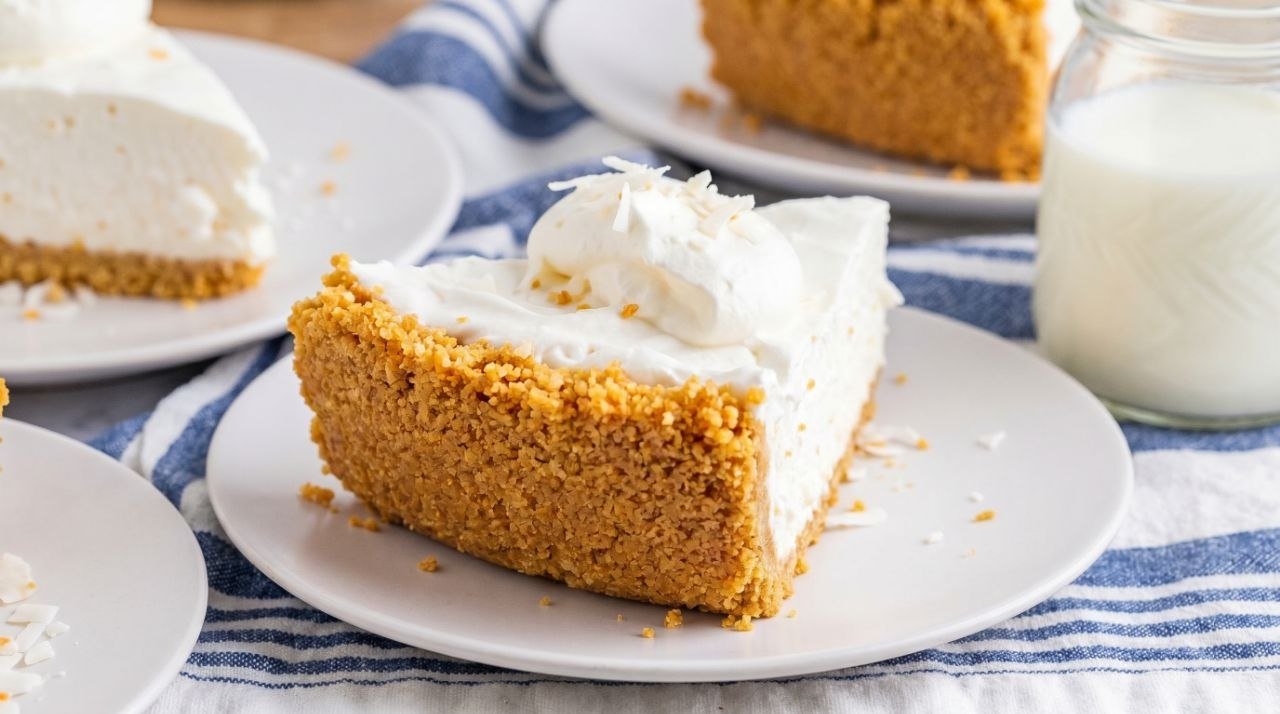
No Bake Coconut Cream Pie is a cold, silky, tropical dessert that requires zero oven time and delivers a filling so rich and creamy it holds a clean slice straight from the refrigerator — a buttery graham cracker crust pressed into a pie dish, a thick coconut pudding filling made with full-fat coconut milk and cream cheese, and a generous layer of whipped cream and toasted coconut flakes on top that makes every plate look like it came from a proper bakery. The whole thing comes together in about twenty minutes of active work, chills completely in four to six hours, and tastes like a restaurant-quality dessert that required considerably more skill than it actually did. It is the pie you make in June when the kitchen is already too hot and the last thing you want is to turn the oven on for an hour.
What makes this version stand apart from every grocery store coconut cream pie is the decision to use full-fat coconut milk instead of regular dairy milk as the liquid base for the filling. Standard coconut cream pie recipes use standard pudding mix dissolved in cow’s milk, which produces a filling that tastes faintly of artificial coconut flavoring without any of the real tropical richness. Replacing the dairy with full-fat coconut milk — the kind that separates into thick cream and thin liquid in the can — gives the filling a natural coconut flavor that is deep, fatty, and unmistakably real, and the cream cheese folded into it provides enough body to set the filling firm without gelatin while adding a subtle tang that prevents the dessert from tasting flat or one-dimensionally sweet.
Why No Bake Coconut Cream Pie Works Every Time
This pie succeeds because every component does a structural job, not just a flavor one. The graham cracker crust sets through fat crystallization — the melted butter coats every crumb and solidifies in the refrigerator into a firm, cohesive base that holds a clean slice without crumbling. The filling sets through a combination of cream cheese emulsification and cold temperature — the fat in the cream cheese traps air and holds the coconut milk in a stable, semi-solid structure that slices cleanly rather than running when the pie is cut. The whipped cream on top stays stable when the pie is kept cold, and the toasted coconut provides the crunch that prevents the dessert from feeling uniformly soft across every bite. No baking means no risk of a cracked filling, no blind-baked crust that browns unevenly, and no custard that breaks in a hot oven — three of the most common failure points in traditional coconut cream pie recipes disappear entirely.
The Science Behind Coconut Cream Pie
The richness of this filling comes directly from the fat content of the coconut milk used to make it. Coconut milk is an emulsion of coconut oil and water stabilized by naturally occurring proteins and carbohydrates in the coconut flesh — the full-fat variety contains between 17 and 24 percent fat by weight, which gives it a body and creaminess that low-fat coconut milk and dairy milk cannot replicate. That fat is what makes the filling feel luxurious in the mouth, and it is also what helps the cream cheese emulsification hold the structure firm enough to slice at refrigerator temperature. Shaking or stirring the can before using it ensures the fat is distributed evenly through the liquid rather than sitting in a solid cap at the top of the can, which would produce a filling with uneven richness across the dish.
The toasted coconut flakes used as garnish are not decorative — they are a textural counterpoint built on the Maillard reaction, the same browning chemistry that gives bread crust and roasted coffee their complex flavor. Raw coconut flakes are soft, bland, and faintly sweet. Toasting them in a dry pan over medium heat for three to five minutes develops hundreds of new aromatic compounds through the reaction between the naturally occurring sugars and amino acids in the coconut, producing a nutty, caramelized, slightly bitter edge that contrasts directly against the sweet, cold filling beneath it. That contrast is what makes the finished pie taste layered and intentional rather than uniformly sweet from the first bite to the last.
What Goes In
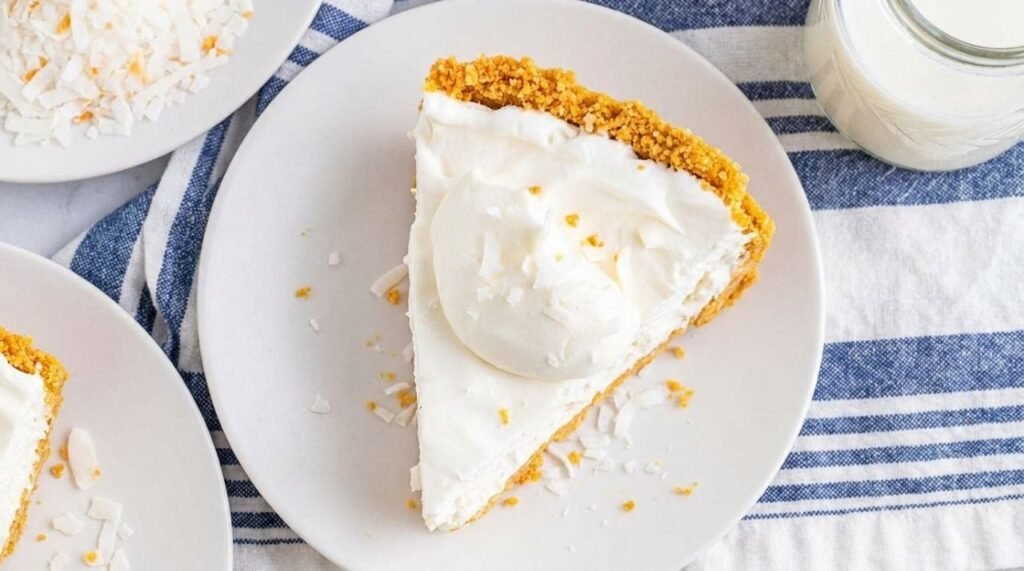
Two layers, twelve ingredients, one standard 9-inch pie dish.
2 cups graham cracker crumbs, about 14 full sheets crushed.
6 tablespoons unsalted butter, melted.
2 tablespoons granulated sugar, for the crust.
8 oz block cream cheese, fully softened to room temperature.
3/4 cup powdered sugar.
1 can full-fat coconut milk, 13.5 oz, shaken well.
1 teaspoon pure vanilla extract.
1/2 teaspoon coconut extract, optional but recommended.
8 oz whipped topping, thawed, divided — half for filling, half for topping.
1 cup sweetened shredded coconut, toasted, for garnish.
Pinch of kosher salt, for the filling.
Want to Mix It Up?
Use an Oreo crust instead of graham cracker if you want a chocolate-coconut contrast — crush 24 Oreo cookies with their filling intact, mix with 5 tablespoons of melted butter, and press into the dish. The chocolate bitterness in the crust amplifies the sweetness of the coconut filling in the same way a dark chocolate truffle shell works against its soft center.
Replace the whipped topping with 2 cups of heavy cream beaten to stiff peaks with 2 tablespoons of powdered sugar if you want a from-scratch version with no stabilizers. Fresh whipped cream produces a lighter, less sweet filling and topping, but it begins to weep after about 24 hours, so serve the pie on the same day or the next day rather than making it two days ahead.
Add 1/2 cup of crushed pineapple, fully drained and pressed dry in a paper towel, into the filling layer for a pina colada variation that leans tropical without changing the structure of the pie. The pineapple must be completely dry before it goes in — any residual juice will introduce enough moisture to prevent the filling from setting firmly at refrigerator temperature.
Use a pre-made graham cracker pie crust from the store if you are pressed for time. The flavor difference is minimal, and the structural difference matters only if you are concerned about the crust sides — store-bought crusts tend to have shallower walls than a hand-pressed one, so extra filling may overflow when the pie is sliced.
How to Make No Bake Coconut Cream Pie
Step 1 – Make the graham cracker crust: In a medium bowl, stir the graham cracker crumbs, melted butter, and granulated sugar together until every crumb is evenly coated in butter and the mixture holds its shape when pressed between two fingers. Pour it into a 9-inch pie dish and press firmly across the bottom and up the sides to form a wall at least 1 inch tall, using the flat bottom of a measuring cup for the base and the back of a spoon for the sides. The crust must be dense and compacted, not loose — any loose areas will crumble when the pie is sliced rather than holding together as a clean layer. Refrigerate the crust for 20 minutes before filling so the butter firms up and the crust sets into a stable structure.
Step 2 – Beat the cream cheese base: In a large bowl, beat the fully softened cream cheese and powdered sugar together with a hand mixer on medium speed for about 2 minutes until the mixture is completely smooth, light, and fluffy with no visible lumps. Cold cream cheese cannot be beaten smooth regardless of mixer speed — it must be genuinely at room temperature, meaning it yields immediately when pressed with a fingertip. Add the vanilla extract, coconut extract, and a pinch of salt, then pour in the full-fat coconut milk in a slow, steady stream while the mixer runs on low to incorporate it gradually without splashing. The coconut milk should emulsify into the cream cheese smoothly — if any lumps appear, beat for another 30 seconds on medium until the filling looks uniform and glossy.
Step 3 – Fold in the whipped topping: Add half of the thawed whipped topping to the cream cheese mixture and fold it in with a rubber spatula using slow, deliberate strokes from the bottom of the bowl upward. The goal is to preserve as much air as possible so the filling stays light and mousse-like rather than dense — do not stir in circles, which knocks the air out, and do not rush. Fold until no white streaks remain and the filling looks uniform in color and texture, which typically takes 10 to 12 folds. Reserve the remaining whipped topping for the top of the finished pie.
Step 4 – Toast the coconut and fill the crust: While the filling rests, spread the shredded coconut in a dry skillet over medium heat and stir continuously for 3 to 5 minutes until it turns golden and fragrant. Watch it closely — toasted coconut goes from golden to burned in under a minute and the sugars in the flakes do not give much warning before scorching. Remove from heat immediately when the color looks right and transfer to a plate to cool completely. Pour the coconut cream filling into the chilled graham cracker crust and smooth the surface with an offset spatula until flat and level all the way to the edges.
Step 5 – Top, chill, and serve: Spread the reserved whipped topping evenly over the surface of the filling, then scatter the toasted coconut flakes generously across the entire top so every slice will have both garnish and texture. Cover the pie loosely with plastic wrap, taking care not to press the wrap against the whipped topping surface, and refrigerate for a minimum of 4 hours — overnight is strongly preferred for the cleanest slices and the most cohesive flavor. Slice with a sharp knife wiped clean between each cut, pressing straight down through the crust rather than dragging. Serve cold directly from the refrigerator.
3 Mistakes That Ruin No Bake Coconut Cream Pie
Using light coconut milk instead of full-fat: Light coconut milk has had a significant portion of its fat removed and replaced with water, which means it cannot provide the body, richness, or fat content the filling needs to set at refrigerator temperature. The filling will stay too soft, weep liquid after a few hours, and taste thin rather than creamy. Always use full-fat coconut milk, check the label for fat content above 15 percent, and shake the can thoroughly before opening to distribute the fat evenly.
Not chilling the crust before adding the filling: A crust that has not been refrigerated is still loose and warm from the melted butter, which means the heavy filling poured on top pushes into the crust rather than sitting cleanly on it. The boundary between crust and filling becomes muddy, the crust shifts when the pie is sliced, and the structural integrity of every serving is compromised from the first piece. The twenty minutes of chill time for the crust is not optional — it is what separates a crust that holds from one that falls apart.
Stirring the whipped topping instead of folding: Whipped topping and whipped cream are both aerated fats — their light, creamy texture comes entirely from air bubbles trapped inside the fat structure, and those bubbles collapse under the shear force of stirring. A filling made with stirred whipped topping is noticeably denser, heavier, and less pleasant in the mouth than one made with properly folded topping. Fold with slow, sweeping strokes from the bottom of the bowl, rotate the bowl a quarter turn between each fold, and stop the moment the mixture is uniform — over-folding collapses the air just as effectively as stirring does.
What to Serve With No Bake Coconut Cream Pie
Coconut Cream Pie is a complete dessert on its own, but it pairs naturally with other cold, fruit-forward sweets on a summer dessert table. For a full no-bake spread, serve it alongside our Easy Lemon Bars — the sharp citrus cuts directly against the rich coconut cream and gives guests a light, bright alternative on the same plate. If you want to add a warm-weather cookie option to the table, our Soft Peanut Butter Cookies balance the tropical richness of the pie with their nutty, slightly salty finish and require almost as little effort to prepare.

Easy No Bake Coconut Cream Pie
Ingredients
Equipment
Method
- How to Make No Bake Coconut Cream Pie
- Step 1 – Make the graham cracker crust: In a medium bowl, stir the graham cracker crumbs, melted butter, and granulated sugar together until every crumb is evenly coated in butter and the mixture holds its shape when pressed between two fingers. Pour it into a 9-inch pie dish and press firmly across the bottom and up the sides to form a wall at least 1 inch tall, using the flat bottom of a measuring cup for the base and the back of a spoon for the sides. The crust must be dense and compacted, not loose — any loose areas will crumble when the pie is sliced rather than holding together as a clean layer. Refrigerate the crust for 20 minutes before filling so the butter firms up and the crust sets into a stable structure.
- Step 2 – Beat the cream cheese base: In a large bowl, beat the fully softened cream cheese and powdered sugar together with a hand mixer on medium speed for about 2 minutes until the mixture is completely smooth, light, and fluffy with no visible lumps. Cold cream cheese cannot be beaten smooth regardless of mixer speed — it must be genuinely at room temperature, meaning it yields immediately when pressed with a fingertip. Add the vanilla extract, coconut extract, and a pinch of salt, then pour in the full-fat coconut milk in a slow, steady stream while the mixer runs on low to incorporate it gradually without splashing. The coconut milk should emulsify into the cream cheese smoothly — if any lumps appear, beat for another 30 seconds on medium until the filling looks uniform and glossy.
- Step 3 – Fold in the whipped topping: Add half of the thawed whipped topping to the cream cheese mixture and fold it in with a rubber spatula using slow, deliberate strokes from the bottom of the bowl upward. The goal is to preserve as much air as possible so the filling stays light and mousse-like rather than dense — do not stir in circles, which knocks the air out, and do not rush. Fold until no white streaks remain and the filling looks uniform in color and texture, which typically takes 10 to 12 folds. Reserve the remaining whipped topping for the top of the finished pie.
- Step 4 – Toast the coconut and fill the crust: While the filling rests, spread the shredded coconut in a dry skillet over medium heat and stir continuously for 3 to 5 minutes until it turns golden and fragrant. Watch it closely — toasted coconut goes from golden to burned in under a minute and the sugars in the flakes do not give much warning before scorching. Remove from heat immediately when the color looks right and transfer to a plate to cool completely. Pour the coconut cream filling into the chilled graham cracker crust and smooth the surface with an offset spatula until flat and level all the way to the edges.
- Step 5 – Top, chill, and serve: Spread the reserved whipped topping evenly over the surface of the filling, then scatter the toasted coconut flakes generously across the entire top so every slice will have both garnish and texture. Cover the pie loosely with plastic wrap, taking care not to press the wrap against the whipped topping surface, and refrigerate for a minimum of 4 hours — overnight is strongly preferred for the cleanest slices and the most cohesive flavor. Slice with a sharp knife wiped clean between each cut, pressing straight down through the crust rather than dragging. Serve cold directly from the refrigerator.
Notes
