
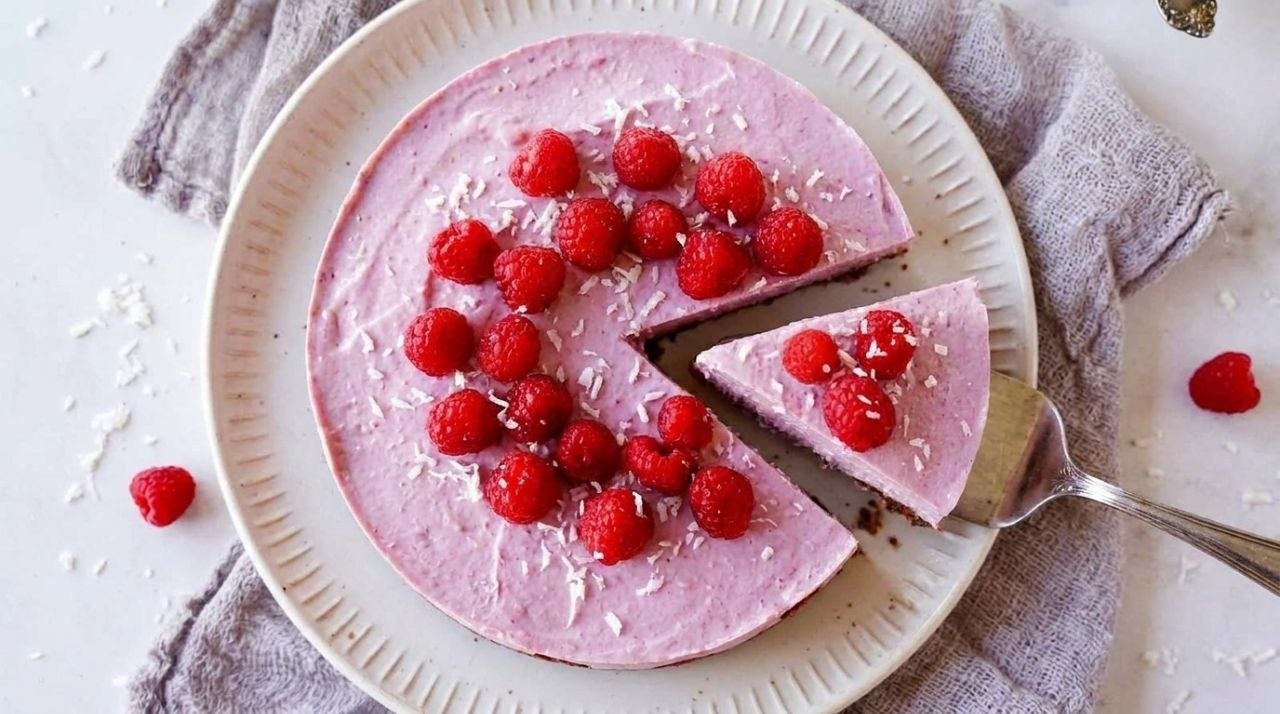
No Bake Raspberry Cheesecake is a summer dessert that earns its place on the table through contrast — the buttery, crumbly biscuit crust underneath, the cold and silky cream cheese filling in the middle, and the glossy, jewel-bright raspberry topping on top that is tart enough to cut through the richness of the dairy and make every forkful taste lighter than its ingredient list suggests. It requires no oven, no water bath, no springform anxiety, and no special equipment beyond a hand mixer and a pan, yet it produces a dessert that looks polished, holds its layers cleanly under the knife, and tastes like it came from a patisserie rather than a home kitchen refrigerator. It is the right dessert for every occasion between May and September when turning on the oven feels like a defeat.
What separates this version from most no-bake raspberry cheesecakes is the way the raspberry layer is built. Many recipes fold fresh or frozen raspberries directly into the filling, which sounds appealing but almost always produces a pink, loosely-set mixture that cannot deliver the intensity of real raspberry flavor and collapses when sliced. In this version, the raspberries are cooked briefly into a concentrated, glossy coulis that is then thickened and cooled before being spread over the firm cream cheese base as a defined top layer. That separation of dairy and fruit is not a stylistic choice — it is a structural one. A concentrated coulis delivers more flavor per square inch than a diluted folded-in version, holds the visual definition between layers after chilling, and stays bright red rather than fading into pink after a night in the refrigerator.
Why No Bake Raspberry Cheesecake Works Every Time
The architecture of this cheesecake is built on three components that each have a clear, non-overlapping structural role. The crust is the firm, dry base that provides resistance when the fork presses down and keeps the filling from sitting directly on the plate. The cream cheese filling is the creamy, rich middle that carries the vanilla and dairy flavor and holds the weight of the topping without softening or slumping over a long refrigerator chill. The raspberry coulis on top provides concentrated fruit flavor, visual drama, and acidity that the dairy layer lacks completely. Because none of these three layers is asked to do another layer’s job, each one performs its role perfectly, which is why this cheesecake slices cleanly, tastes balanced in every bite, and holds its structure for the entire service period rather than softening and merging into itself after the first two slices are cut.
The Science Behind No Bake Raspberry Cheesecake
The set of the cream cheese filling depends on two independent structures working simultaneously. The first is the fat and protein network of cream cheese itself — at room temperature the cheese is soft and spreadable, but once chilled it firms into a dense, sliceable mass because the fat crystallizes and the casein protein network tightens as the temperature drops. Beating the cream cheese fully smooth before folding in other ingredients is essential because any unbroken lumps in the protein network will remain as grainy patches in the finished slice regardless of how long the cheesecake chills. The second structure is the network of air bubbles trapped in the whipped cream — when the whipped cream is folded into the beaten cream cheese, those air bubbles distribute through the fat and protein matrix and give the filling its mousse-like lightness. Without them, a no-bake cheesecake sets into something closer to cold cream cheese spread than a dessert with real textural refinement.
The glossy texture and deep color of the raspberry coulis come from the natural pectin present in the fruit skin and seeds. When raspberries are heated with sugar and a small amount of liquid, the cell walls break down and release their pectin into the surrounding liquid. As the coulis cools, the pectin molecules form weak crosslinks with each other and with the fruit sugars, thickening the liquid into a pourable but lightly gelled consistency that sets more firmly when chilled over the cold cheesecake base. This natural thickening is why the raspberry layer does not need gelatin or cornstarch to hold its shape as a defined top layer — the pectin released from the cooked fruit provides enough structure as long as the coulis is concentrated rather than left thin and watery.
What Goes In
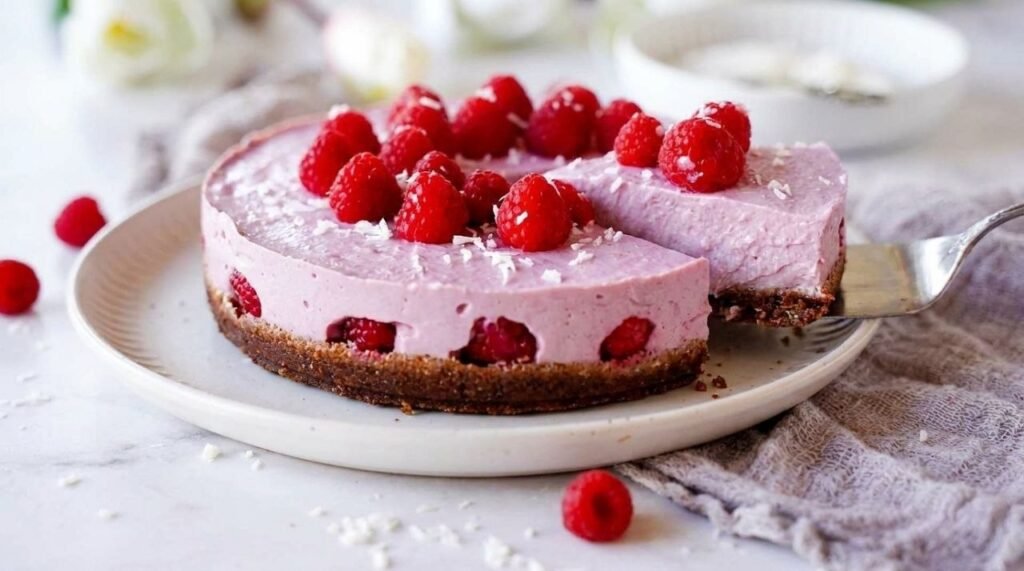
Three clean components, one springform pan, and a refrigerator do all the work.
For the crust:
250 g digestive biscuits or graham crackers, finely crushed.
100 g unsalted butter, melted.
For the cheesecake filling:
500 g full-fat cream cheese, softened at room temperature for at least 30 minutes.
1 cup heavy cream, very cold.
3/4 cup powdered sugar.
1 teaspoon pure vanilla extract.
1 tablespoon fresh lemon juice.
For the raspberry coulis topping:
300 g fresh or frozen raspberries.
3 tablespoons granulated sugar.
1 tablespoon lemon juice.
Fresh raspberries and mint leaves for garnish.
Want to Mix It Up?
Use a mixture of raspberries and strawberries for the coulis if you want a topping with a slightly sweeter, less tart profile. Strawberries contain more natural sugar than raspberries and soften into the coulis smoothly, but their lower pectin content means the topping will be slightly thinner, so reduce it for an extra minute or two longer than the recipe specifies.
Replace the vanilla in the filling with rose water if you want a more floral, perfumed cheesecake that pairs especially well with the raspberry topping. Use only half a teaspoon because rose water is significantly more potent than vanilla and can overwhelm the dairy flavor if used too generously.
Fold two tablespoons of raspberry jam into the cream cheese filling before spreading it into the crust if you want raspberry flavor running through both the filling and the topping. The jam adds color and flavor to the interior without destabilizing the set the way fresh berries would, and it creates a beautiful pink-tinted filling that previews the topping before the first bite.
Use crushed chocolate cookies instead of digestive biscuits for the crust if you want a dark, slightly bitter base that contrasts the sweet fruit and creamy filling. The chocolate-raspberry combination is a classic flavor pairing, and the dark crust makes the layers look more dramatic when the cheesecake is sliced and plated.
How to Make No Bake Raspberry Cheesecake
Step 1 – Make and chill the crust: Combine the finely crushed biscuits and melted butter in a bowl and stir until every crumb is evenly moistened and the mixture holds together when pressed between two fingers. Press it firmly and evenly into the base of a lined 9-inch springform pan using the flat bottom of a glass or measuring cup to compact it into a smooth layer with no loose crumbs. The crust should feel dense and solid, not crumbly or dry. Refrigerate for at least 20 minutes before adding the filling so it firms up into a stable foundation that will not lift when the cheesecake is sliced.
Step 2 – Make the raspberry coulis: Combine the raspberries, granulated sugar, and lemon juice in a small saucepan over medium heat. Cook, stirring occasionally, until the raspberries completely break down and the mixture reduces into a thicker, glossy liquid, about 8 to 10 minutes. The coulis should coat the back of a spoon and leave a clean line when you draw a finger across it. Strain it through a fine mesh sieve into a bowl, pressing firmly on the solids to extract as much liquid as possible. Let it cool completely to room temperature before using — spreading warm coulis over cold cheesecake will soften the filling and disturb the clean layer boundary.
Step 3 – Make the cheesecake filling: Whip the cold heavy cream to medium-stiff peaks in a chilled bowl and set it aside in the refrigerator. In a separate large bowl, beat the softened cream cheese with the powdered sugar, vanilla, and lemon juice until completely smooth, light, and fluffy — no lumps should remain and the mixture should look uniformly pale and creamy. Any unbeaten lumps at this stage will remain as grainy spots in the finished slice. Fold the whipped cream into the cream cheese in three additions, using a wide spatula and a gentle folding motion that preserves the air in the whipped cream rather than knocking it out with vigorous stirring.
Step 4 – Fill and level: Spoon the cheesecake filling over the chilled crust and spread it into a smooth, even layer using an offset spatula or the back of a large spoon. Work from the center outward and press the filling gently into the edges of the pan so there are no air pockets between the filling and the crust. The top surface should be as flat and level as possible so the raspberry coulis spreads into an even layer rather than pooling in the center or running toward the edges.
Step 5 – Add the topping and chill: Pour the completely cooled raspberry coulis over the surface of the filling and spread it gently to the edges with the back of a spoon. Cover the pan and refrigerate for at least 6 hours, though overnight produces the cleanest slice and the most developed flavor. Unmold by carefully releasing the springform and running a thin knife around the edge if needed. Garnish with fresh raspberries and mint leaves and slice with a sharp knife wiped clean between cuts so the raspberry layer stays sharp and defined on each portion.
3 Mistakes That Ruin No Bake Raspberry Cheesecake
Using cold cream cheese directly from the refrigerator: Cold cream cheese does not beat smooth — the fat is too hard and firm to fully incorporate, and the resulting filling contains microscopic lumps that remain grainy in the finished slice even after hours of chilling. Bring the cream cheese to room temperature for at least 30 minutes before beating so the fat softens enough to become fully homogeneous when the mixer runs. This single step is the most commonly skipped and the one most responsible for the grainy texture that disappoints in a no-bake cheesecake.
Spreading warm coulis over the filling: Warm liquid spread over cold cream cheese immediately begins to melt the surface of the filling and dissolve the boundary between the dairy layer and the fruit layer. By the time the cheesecake chills, the two layers have blended into each other along their interface, producing a pink-tinged, indistinct border where there should be a clean red-on-white line. Always let the coulis cool completely before spreading it, and if in doubt, refrigerate it briefly until it is cold to the touch.
Cutting before the cheesecake has fully set: No-bake cheesecake sets in the refrigerator through fat crystallization and protein network tightening, and both of those processes need time — at minimum six hours, and preferably overnight. A cheesecake cut at three hours may look set on the surface but will have a soft, pudding-like interior that flows rather than holds when the springform is released. The patience required here is exactly as long as described in the recipe, and there is no technique or ingredient adjustment that can compress it.
What to Serve With No Bake Raspberry Cheesecake
No Bake Raspberry Cheesecake is the kind of dessert that closes a summer dinner on a high note regardless of what came before it, but it pairs especially well after meals that are warm and savory without being too heavy. After our Creamy Lemon Chicken, the cold, sweet raspberry and cream finish what the citrus-forward main started and gives the meal a sense of deliberate flavor direction. For a full dessert table, place it alongside our No Bake Mango Cheesecake so guests can choose between the tart berry version and the sweeter tropical one — the two share the same crust and dairy base, so they look like a matched pair on the table even though their flavor profiles are entirely different.

Easy No Bake Raspberry Cheesecake
Ingredients
Method
- How to Make No Bake Raspberry Cheesecake
- Step 1 – Make and chill the crust: Combine the finely crushed biscuits and melted butter in a bowl and stir until every crumb is evenly moistened and the mixture holds together when pressed between two fingers. Press it firmly and evenly into the base of a lined 9-inch springform pan using the flat bottom of a glass or measuring cup to compact it into a smooth layer with no loose crumbs. The crust should feel dense and solid, not crumbly or dry. Refrigerate for at least 20 minutes before adding the filling so it firms up into a stable foundation that will not lift when the cheesecake is sliced.
- Step 2 – Make the raspberry coulis: Combine the raspberries, granulated sugar, and lemon juice in a small saucepan over medium heat. Cook, stirring occasionally, until the raspberries completely break down and the mixture reduces into a thicker, glossy liquid, about 8 to 10 minutes. The coulis should coat the back of a spoon and leave a clean line when you draw a finger across it. Strain it through a fine mesh sieve into a bowl, pressing firmly on the solids to extract as much liquid as possible. Let it cool completely to room temperature before using — spreading warm coulis over cold cheesecake will soften the filling and disturb the clean layer boundary.
- Step 3 – Make the cheesecake filling: Whip the cold heavy cream to medium-stiff peaks in a chilled bowl and set it aside in the refrigerator. In a separate large bowl, beat the softened cream cheese with the powdered sugar, vanilla, and lemon juice until completely smooth, light, and fluffy — no lumps should remain and the mixture should look uniformly pale and creamy. Any unbeaten lumps at this stage will remain as grainy spots in the finished slice. Fold the whipped cream into the cream cheese in three additions, using a wide spatula and a gentle folding motion that preserves the air in the whipped cream rather than knocking it out with vigorous stirring.
- Step 4 – Fill and level: Spoon the cheesecake filling over the chilled crust and spread it into a smooth, even layer using an offset spatula or the back of a large spoon. Work from the center outward and press the filling gently into the edges of the pan so there are no air pockets between the filling and the crust. The top surface should be as flat and level as possible so the raspberry coulis spreads into an even layer rather than pooling in the center or running toward the edges.
- Step 5 – Add the topping and chill: Pour the completely cooled raspberry coulis over the surface of the filling and spread it gently to the edges with the back of a spoon. Cover the pan and refrigerate for at least 6 hours, though overnight produces the cleanest slice and the most developed flavor. Unmold by carefully releasing the springform and running a thin knife around the edge if needed. Garnish with fresh raspberries and mint leaves and slice with a sharp knife wiped clean between cuts so the raspberry layer stays sharp and defined on each portion.
Notes
