
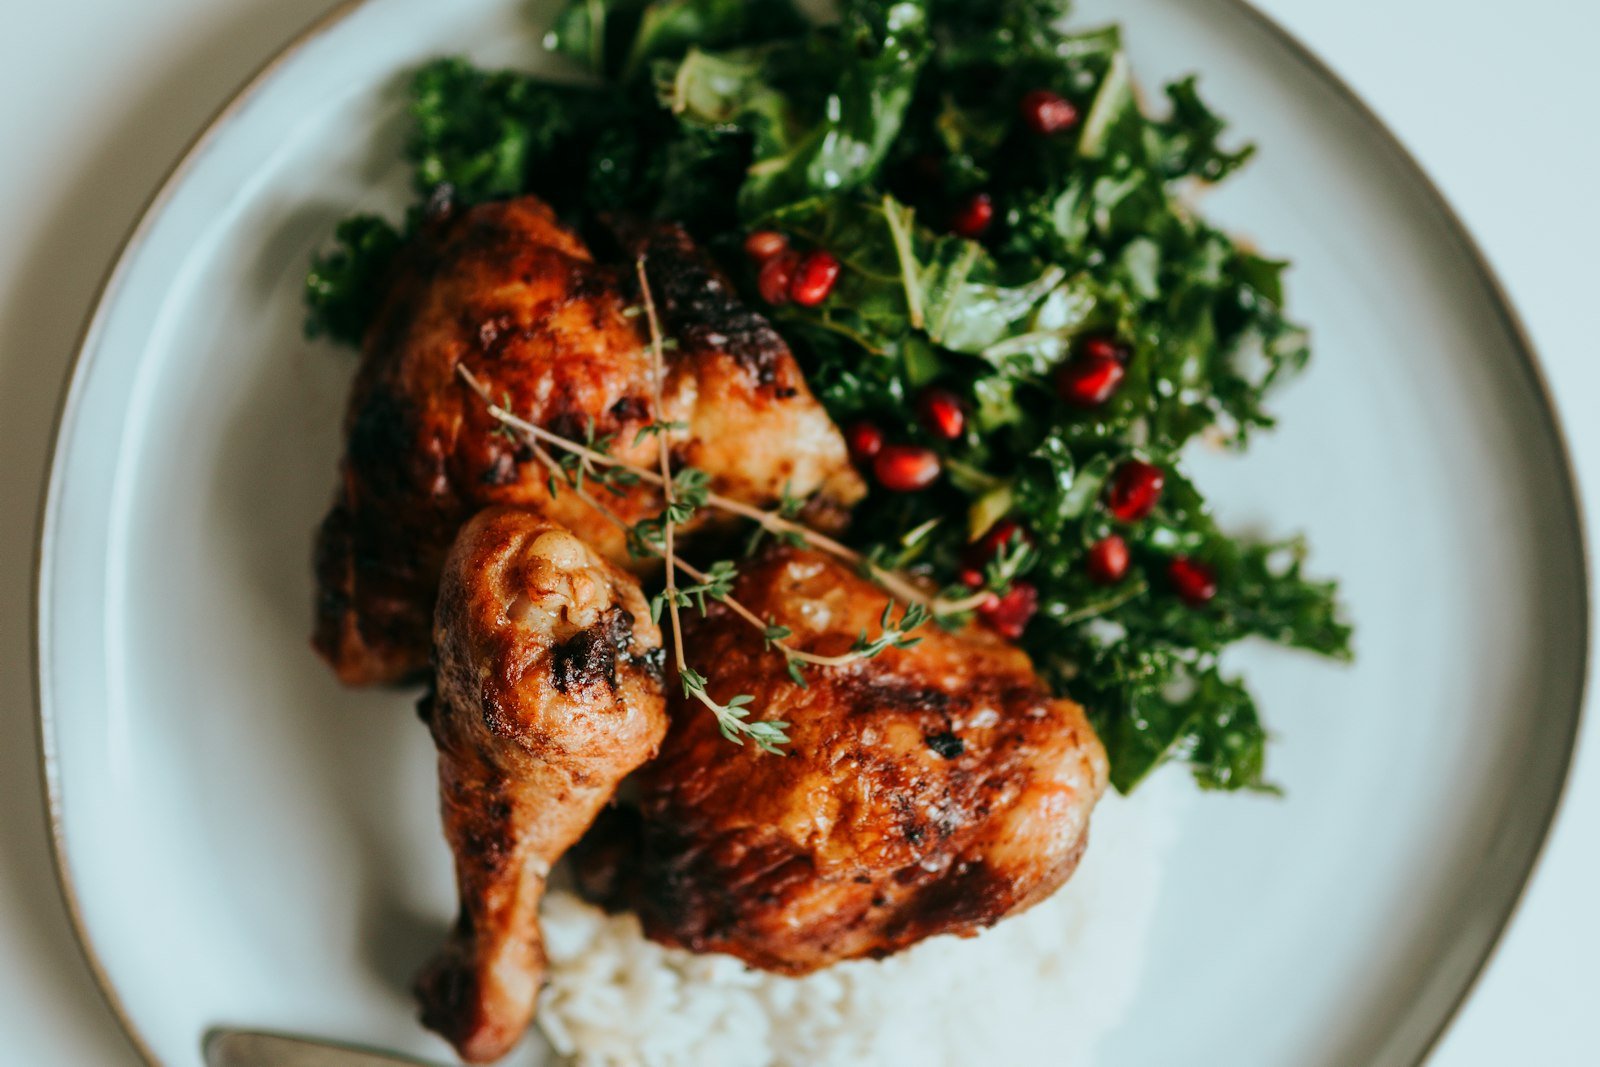
Some dinners earn a permanent spot on the weeknight rotation, and these honey garlic chicken thighs are one of mine. The skin is crisp and burnished, the meat is tender enough to pull from the bone with a fork, and the glaze is sweet, savory and full of garlic.
I used to bake chicken thighs only with salt, pepper and paprika, and they were fine. Then one evening I stirred together honey, soy sauce and a heap of garlic for a stir-fry, ended up spooning it over thighs in a pan, and everything changed. The sugar caramelized on the skin and the juices turned into a glossy sauce I wanted to drink.
This recipe shows you how to get crisp skin in the oven, when to add the honey so it does not scorch, how to know the chicken is done, and what to serve alongside. It is a one-pan dinner with very little cleanup.

Why Bone-In Thighs Are the Best Choice
If you have mostly cooked chicken breasts, thighs may be a revelation. The bone conducts heat to the center of the meat and helps it cook gently, while the skin bastes the flesh as the fat renders. Together they make a juicy, deeply flavored piece of chicken that rarely needs a brine or a marinade to taste good.
Chicken thighs have more fat and connective tissue than breasts, and that is exactly why they stay moist. They forgive an extra few minutes in the oven, they are budget friendly, and the skin turns delightfully crisp when the pan is hot.
- Forgiving: thighs do not dry out when slightly overcooked.
- Flavorful: dark meat tastes richer and takes well to sweet and savory sauces.
- Affordable: a family pack feeds a crowd for a fraction of the price of breasts.
- Crispy skin: rendering fat creates crunch that boneless pieces cannot match.
- One-pan friendly: they cook alongside vegetables with no fuss.
Ingredients for Honey Garlic Chicken Thighs
- Bone-in, skin-on chicken thighs (8 pieces, about 3 pounds): similar in size so they cook evenly.
- Olive oil (1 tablespoon), kosher salt (1 1/2 teaspoons) and pepper: for the seasoning.
- Smoked paprika and garlic powder (1 teaspoon each): a base layer of flavor.
- Honey (1/3 cup): the sticky sweet base of the glaze.
- Soy sauce (3 tablespoons): use low-sodium to control the saltiness.
- Garlic (6 cloves): minced fresh. Do not use jarred garlic here, because it tastes sour when cooked.
- Apple cider vinegar (1 tablespoon) and butter (2 tablespoons): to balance and add silkiness.
- Finishing touches: sesame seeds, sliced green onion, red pepper flakes.
How to Make Honey Garlic Chicken Thighs
Roast the chicken first for crispy skin and add the glaze later. Honey burns at high heat, so patience at this stage pays off.
- Heat the oven to 425F (220C). Place a 12-inch oven-safe skillet or a rimmed baking sheet in the oven to warm.
- Dry the thighs thoroughly. Rub with oil, then season all over with salt, pepper, paprika and garlic powder.
- Place the thighs skin-side down in the hot skillet if using a pan; they should sizzle. Sear 4 minutes, then flip skin-side up. On a baking sheet, simply arrange skin-side up.
- Roast 25 minutes, until the skin is golden and the thickest part reads about 160F.
- While the chicken roasts, whisk the honey, soy sauce, garlic, vinegar and 2 tablespoons water. Simmer in a small saucepan for 3 to 4 minutes, then stir in the butter. The sauce will be thin; it thickens as it cools.
- Spoon half the glaze over the thighs. Return to the oven for 8 to 10 minutes, until the glaze bubbles and the chicken reaches 175F (80C).
- Rest for 5 minutes, brush with the remaining glaze, and sprinkle with sesame seeds and green onion.
Doneness: 165F Is Safe, 175F Is Better
The USDA says chicken is safe at 165F (74C), and that is the temperature at which you can eat it with confidence. For thighs, though, I cook to 175F (80C) because the connective tissue relaxes and the meat turns silky and pulls off the bone. At 165F thighs can taste slightly rubbery near the bone.
- Insert an instant-read thermometer into the thickest part of the thigh without touching the bone.
- Check at least two pieces, because sizes vary.
- The juices should run clear, and the meat should wiggle easily from the bone.
- Remember carryover cooking: the temperature rises 3 to 5 degrees as the chicken rests.
You can find the official numbers in the USDA safe temperature chart. Remember that raw chicken should never be rinsed, and boards, knives and hands should be washed with hot soapy water after touching it.
Tips for Crispy Skin and Sticky Glaze
- Dry brine: salt the thighs and refrigerate uncovered for 1 to 8 hours. The skin dries out and crisps better.
- Hot pan: a preheated pan or sheet starts the rendering process right away.
- Late glaze: add the honey mixture in the final 10 minutes; earlier and it will blacken.
- Space between pieces: crowding steams the skin and softens it.
- Rest before serving: five minutes allows the juices to redistribute and the glaze to set.
- Broil to finish: for extra color, broil for 1 to 2 minutes at the end, watching carefully.
- Use a light pan: dark pans brown the honey faster, so line them with parchment or lower the oven by 25F.
- Baste once: spooning the pan juices over the skin halfway through the glazing time builds extra shine.
What to Serve with Honey Garlic Chicken
The sticky sauce begs for something to soak it up. Here are the pairings I rely on.
- Rice: steamed jasmine or basmati rice, with extra sauce spooned on top.
- Potatoes: fluffy roasted garlic mashed potatoes are a comforting match.
- Vegetables: add broccoli to the pan during the last 15 minutes, or serve with honey garlic roasted carrots for a double dose of flavor.
- Salad: a crunchy cabbage slaw with lime and sesame oil cuts through the sweetness.
If you love this flavor combination, you might also enjoy a lighter, buttery version in my garlic butter chicken thighs, or a seafood twist with honey garlic shrimp skewers. For something crunchier, try the hot honey chicken tenders with the same sweet-hot spirit.
Add Vegetables for a Complete Sheet Pan Meal
To turn this into a single-pan dinner, scatter vegetables around the chicken. Choose pieces that cook in the same time frame, and toss them in oil and salt first.
| Vegetable | Cut | When to add |
|---|---|---|
| Broccoli florets | Medium | With the glaze, last 10 minutes |
| Baby potatoes | Halved | At the start, with the chicken |
| Green beans | Whole | Last 15 minutes |
| Sweet potato | 1-inch cubes | At the start |
| Bell peppers | Strips | Last 15 minutes |
Place the vegetables on the pan only after the chicken has had its first 10 minutes, so the skin gets direct heat. The chicken fat drips onto the vegetables and flavors them nicely.
Variations
- Spicy: add 1 tablespoon sriracha or a teaspoon of chili flakes to the glaze.
- Ginger: stir 1 tablespoon grated ginger into the sauce for an Asian-inspired flavor.
- Citrus: add orange zest and juice for a bright note.
- Boneless thighs: bake at 425F for 20 to 25 minutes total, glazing in the last 8.
- Drumsticks: cook 35 to 40 minutes, glazing in the final 10.
- Slow cooker: cook skinless thighs on low for 5 hours in the sauce, then broil for color.
- Air fryer: cook at 380F for 22 to 26 minutes, glazing for the last 4.
Make-Ahead, Storage and Reheating
You can season the thighs and mix the sauce up to a day ahead. Keep the chicken uncovered in the refrigerator for crisper skin, and store the sauce in a jar. Bring the chicken to room temperature for 20 minutes before roasting.
For busy weeks, I roast a double batch on Sunday. Half goes on the table that night, and the other half becomes lunch bowls with rice, cucumbers and a spoonful of the sauce. The glaze keeps the meat moist as it sits, so even day-three leftovers taste good. Shred the cold meat for tacos, fried rice or sandwiches when you want a quick change.
Refrigerate leftovers within two hours in an airtight container for up to four days. Reheat at 350F for 15 minutes until hot throughout, or microwave in short bursts. Reheated chicken should again reach 165F. To freeze, pack cooled thighs with sauce in a freezer bag for up to three months and thaw overnight in the refrigerator.
Frequently Asked Questions
What temperature should chicken thighs be cooked to?
Chicken is safe at 165F, but thighs taste best at 175F. The extra heat melts connective tissue, giving tender meat that pulls cleanly from the bone. Use an instant-read thermometer in the thickest part without touching bone.
How do I keep the honey from burning?
Add the glaze during the last 8 to 10 minutes of baking, not at the start. Honey has high sugar content and darkens fast. If the edges brown too quickly, cover loosely with foil.
Can I use boneless skinless thighs?
Yes. Reduce the time to about 20 to 25 minutes total at 425F, adding the glaze for the last 8 minutes. The skin will not crisp, but the meat stays juicy and the sauce still glazes beautifully.
Can I make this ahead for meal prep?
Yes. Cook the chicken fully, cool it, and store with the sauce for up to four days. It reheats well in the oven. Pack with rice and vegetables for easy lunches.
Why is my chicken skin not crispy?
The most common causes are moisture on the skin, a crowded pan and an oven that is too cool. Dry the skin well, leave space between pieces, and roast at 425F before adding the glaze.
If you cooked this honey garlic chicken tonight, please leave a rating and tell me how you served it. For more easy mains, explore the dinner ideas category.
Honey Garlic Chicken Thighs
Ingredients
Method
- Heat oven to 425F and place a 12-inch oven-safe skillet inside to warm.
- Dry the thighs thoroughly, rub with oil and season with salt, pepper, paprika and garlic powder.
- Place thighs skin-side down in the hot skillet and sear 4 minutes, then flip skin-side up.
- Roast 25 minutes until golden and about 160F.
- Simmer honey, soy sauce, garlic, vinegar and water 3 to 4 minutes, then stir in butter.
- Spoon half the glaze over the chicken and roast 8 to 10 minutes more until 175F.
- Rest 5 minutes, brush with remaining glaze and top with sesame seeds and green onion.
Notes
Crisp skin, juicy meat and a glossy glaze make a dinner that feels special on an ordinary Tuesday. Keep the chicken moving from pan to plate, spoon plenty of sauce on top and enjoy the quiet that falls over the table when everyone starts eating. Chef Amber
Free email bonus
30-Minute Meals
Loved this recipe? Get my collection of fast, family-favorite dinners, plus new seasonal recipes straight to your inbox.