
A tall slice of red velvet cake is one of the most festive things you can put on a dessert plate. The crumb is soft and velvety with a gentle buttermilk tang and just a whisper of cocoa, and the bright red layers look stunning against a thick blanket of fluffy cream cheese frosting. It is a classic Southern celebration cake, and it fits right in on a Christmas table.
In this post I explain what red velvet really tastes like, why oil and buttermilk make the layers so moist, and how to frost a smooth, bakery-style cake at home. You will also find a section on food coloring choices, variations, a troubleshooting table and make-ahead tips. The printable recipe card is waiting at the bottom of the post.
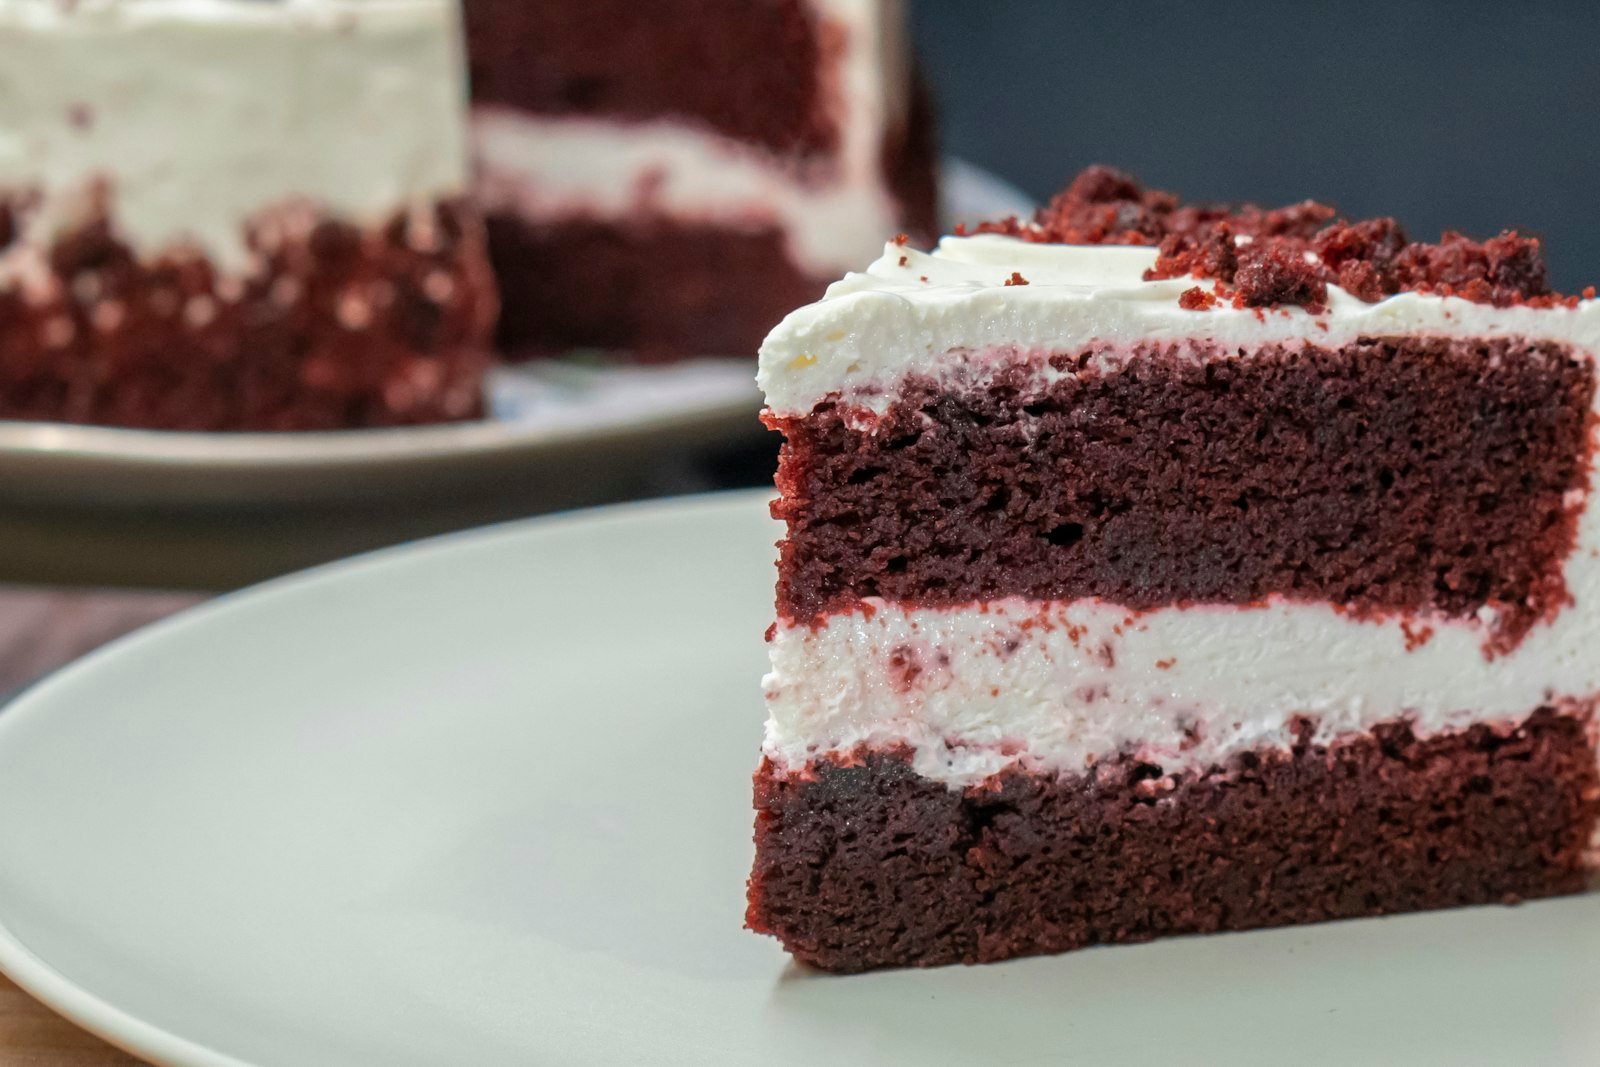
Why This Red Velvet Cake Works
Red velvet is more than a chocolate cake dyed red. Its signature is a fine, tender crumb with a mild cocoa flavor and a little tang, and this recipe is built around exactly that.
- Oil instead of butter. Vegetable oil stays liquid at room temperature, so the cake stays soft and moist even straight from the fridge.
- Buttermilk and vinegar. The acidity tenderizes the crumb, adds the classic tang and reacts with baking soda for a light, even rise.
- Just a little cocoa. Two tablespoons of natural cocoa add depth without turning the cake into chocolate cake.
- A generous cream cheese frosting. A full pound of cream cheese makes a tangy, fluffy frosting that balances the sweet cake.
- Two thick layers. Two 9-inch layers are easier to bake evenly and stack than three thin ones, and they still give a tall, impressive cake.
The batter comes together in two bowls with a whisk, so you do not even need a mixer until it is time to make the frosting. It is a reliable, forgiving cake for beginners and experienced bakers alike.
Ingredients You Will Need
These are simple pantry ingredients. Have the dairy and eggs at room temperature so the batter blends smoothly.
- All-purpose flour: Spoon and level it for a light crumb. Cake flour also works; use 2 3/4 cups.
- Granulated sugar: Sweetens and helps keep the cake moist.
- Natural unsweetened cocoa powder: Natural cocoa keeps the color bright red. Dutch-process cocoa can turn it a darker, browner shade.
- Baking soda and salt: Soda gives the lift and salt balances the sweetness.
- Vegetable oil: Any neutral oil, such as canola, works.
- Buttermilk: Full-fat buttermilk gives the best flavor and texture.
- Eggs and vanilla: Room-temperature eggs for structure, vanilla for warmth.
- Red food coloring: Gel coloring gives a vivid color with only a small amount.
- White vinegar: A teaspoon brightens the color and boosts the rise.
- For the frosting: Full-fat block cream cheese, unsalted butter, powdered sugar, vanilla and a pinch of salt.
How to Make Red Velvet Cake
Bake the layers first and let them cool completely. The frosting comes together while the layers chill, and the cake is assembled in about 15 minutes.
- Prep the pans. Heat the oven to 350°F (175°C). Grease two 9-inch round cake pans, line the bottoms with parchment and grease again.
- Whisk the dry ingredients. In a large bowl, whisk the flour, sugar, cocoa, baking soda and salt until evenly combined.
- Whisk the wet ingredients. In another bowl, whisk the oil, buttermilk, eggs, food coloring, vanilla and vinegar until smooth and evenly red.
- Combine. Pour the wet ingredients into the dry ingredients and whisk just until the batter is smooth and no streaks of flour remain.
- Bake. Divide the batter evenly between the pans and bake for 25 to 30 minutes, until a toothpick in the center comes out clean and the tops spring back.
- Cool. Cool the layers in the pans for 10 minutes, then turn them out onto a wire rack and cool completely. Chill for 30 minutes for easier frosting.
- Make the frosting. Beat the cream cheese and butter until smooth and creamy, then beat in the powdered sugar, vanilla and salt until light and fluffy.
- Assemble. Level the tops with a serrated knife if domed and save the scraps. Frost between the layers, cover the cake with a thin crumb coat, chill 15 minutes, then add the final layer of frosting and press crumbled cake scraps on top.
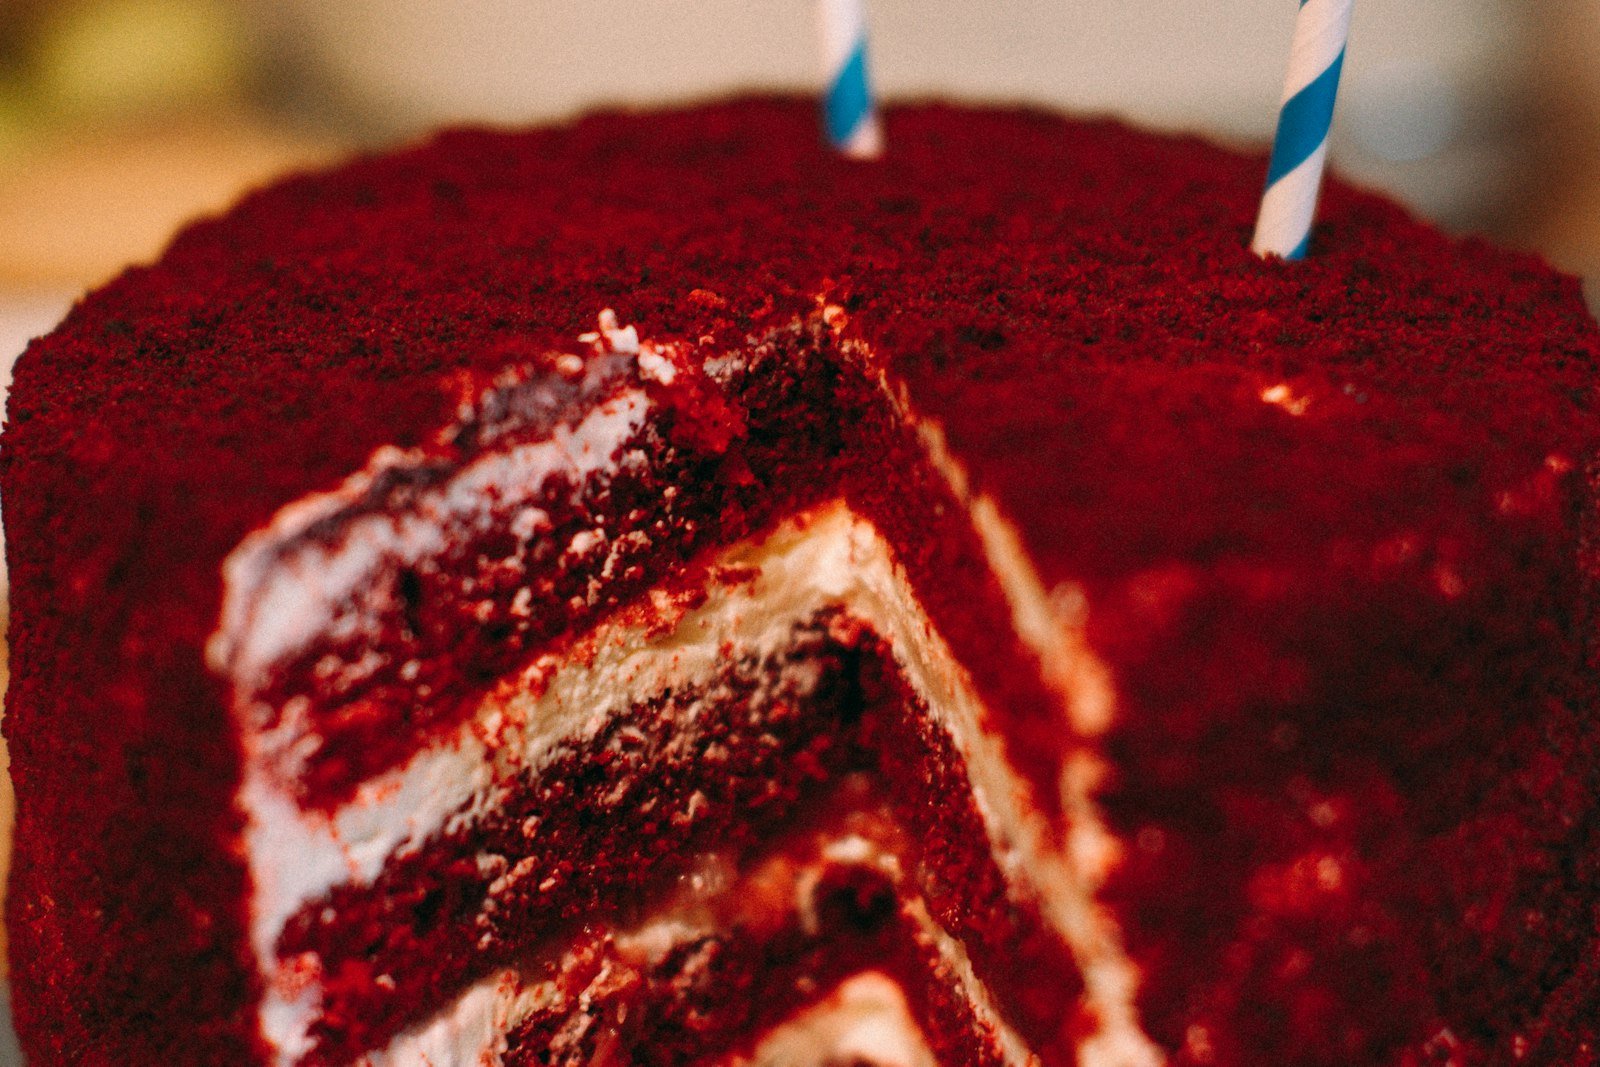
Weigh the batter as you divide it between the pans if you have a kitchen scale. Equal layers bake in the same time and stack into a level cake.
Tips for the Best Red Velvet Layer Cake
- Do not overmix the batter once the wet and dry ingredients meet. Overmixing develops gluten and makes the cake tough.
- Use gel or liquid food coloring designed for baking, and add a little more if the batter looks pink rather than deep red; it darkens slightly in the oven.
- Rotate the pans halfway through baking if your oven has hot spots.
- Chill the layers before frosting. Cold cake produces fewer crumbs and is easier to handle.
- Keep the frosting cool. If it starts to soften while you work, refrigerate it for 10 to 15 minutes.
- Slice with a long knife dipped in hot water and wiped dry between cuts for clean, bakery-style slices.
Planning a holiday dessert spread? Red velvet looks beautiful beside a chocolate yule log cake with ganache bark, a nutty Southern Italian cream cake and a spiced carrot cake with cream cheese frosting. For more baking inspiration, explore my favorite dessert recipes.
What Does Red Velvet Taste Like?
People are often surprised that red velvet is not simply chocolate cake. The flavor is mild and buttery with a faint cocoa note, a slight tang from the buttermilk and vinegar, and plenty of vanilla. The texture is the real star: fine, soft and almost silky, which is where the name velvet comes from.
Long before food coloring was common, natural cocoa reacting with acidic buttermilk gave these cakes a reddish-brown hue. Today most recipes rely on food coloring for the bright red color, but the tangy, tender crumb is the same. Paired with cream cheese frosting, it tastes rich without being heavy.
That gentle flavor is exactly why red velvet works for a crowd. It pleases chocolate lovers and vanilla fans alike, it pairs well with coffee or a glass of cold milk, and it never feels too heavy after a big holiday dinner.
Choosing Your Food Coloring
The color is what makes this cake so festive, and you have a few options depending on how vivid you want it.
- Gel food coloring: My first choice. One to two teaspoons gives a deep red without adding extra liquid.
- Liquid food coloring: The classic supermarket bottle works, but you will need about 2 tablespoons, a full 1-ounce bottle.
- Natural coloring: Beet powder or a plant-based red coloring gives a softer, burgundy shade. The cake may brown a little more in the oven, which is fine.
- No coloring: Simply leave it out for a tender, lightly cocoa-flavored buttermilk cake with a brown crumb. It still tastes wonderful.
Whichever you choose, add the coloring to the wet ingredients rather than the finished batter so it distributes evenly with minimal mixing.
Easy Variations
- Red velvet cupcakes: Fill 24 lined muffin cups two-thirds full and bake for 18 to 22 minutes.
- Sheet cake: Bake in a greased 9×13-inch pan for 30 to 35 minutes and frost the top only.
- Three-layer cake: Divide the batter among three 8-inch pans and bake for 22 to 26 minutes.
- White chocolate frosting: Beat 4 ounces of melted, cooled white chocolate into the cream cheese frosting.
- Christmas decoration: Top with sugared cranberries, fresh rosemary sprigs or white chocolate curls.
- Mascarpone frosting: Replace half the cream cheese with mascarpone for a milder, silkier frosting.
Common Mistakes and How to Fix Them
| Problem | Likely cause | How to fix it |
|---|---|---|
| Dry cake | Overbaked or too much flour | Spoon and level the flour and start checking at 25 minutes. |
| Domed or cracked tops | Oven too hot | Check your oven temperature and use cake strips around the pans. |
| Brownish color | Dutch-process cocoa or too little coloring | Use natural cocoa and gel coloring added to the wet ingredients. |
| Runny frosting | Cream cheese too soft or overbeaten | Chill the frosting 15 minutes and use cold, softened block cream cheese. |
| Lumpy frosting | Cream cheese too cold | Soften it for an hour and beat alone before adding sugar. |
| Crumbs in the frosting | Layers frosted while warm or without a crumb coat | Chill the layers and apply a thin crumb coat first. |
Make Ahead, Storage and Freezing
You can bake the layers up to 2 days ahead. Wrap the cooled layers in plastic wrap and refrigerate them, or freeze them for up to 2 months and thaw overnight in the fridge. The frosting can be made 3 days ahead; let it soften slightly and rewhip before using.
Because the frosting is made with cream cheese, store the finished cake covered in the refrigerator for up to 5 days and do not leave it out for more than 2 hours. Let slices stand for 20 minutes before serving for the softest texture. And as tempting as the bright red batter is, skip licking the bowl; the FDA explains why raw batter and dough are unsafe because of raw flour and eggs.
With Christmas on Friday, December 25, I like to bake the layers on December 23, frost the cake on Christmas Eve and keep it chilled until dessert time. It frees up the oven for the main meal and the cake tastes even better after a night in the fridge.
Frequently Asked Questions
Is red velvet cake just chocolate cake with food coloring?
No. It has only a little cocoa, plus buttermilk and vinegar, which give it a mild, tangy flavor and a fine, velvety crumb.
Can I make red velvet cake without food coloring?
Yes. The cake will be brown instead of red, but the taste and texture stay the same.
Why use oil instead of butter?
Oil keeps the cake moist and soft, even when it is served cold from the refrigerator with cream cheese frosting.
Does red velvet layer cake need to be refrigerated?
Yes. Cream cheese frosting is perishable, so keep the cake refrigerated and do not leave it out longer than 2 hours.
Can I freeze red velvet cake?
Freeze the unfrosted layers for up to 2 months, or freeze frosted slices wrapped well for up to 1 month.
Ready to bake? Here is the full printable red velvet cake recipe with exact measurements, baking time and estimated nutrition.
Red Velvet Cake
Ingredients
Method
- Heat the oven to 350°F (175°C). Grease two 9-inch round pans, line with parchment and grease again.
- Whisk the flour, sugar, cocoa, baking soda and salt in a large bowl.
- In another bowl, whisk the oil, buttermilk, eggs, food coloring, vanilla and vinegar.
- Pour the wet ingredients into the dry and whisk just until smooth.
- Divide between the pans and bake for 25 to 30 minutes, until a toothpick comes out clean.
- Cool 10 minutes in the pans, then turn out onto a rack and cool completely. Chill 30 minutes.
- Beat the cream cheese and butter until smooth. Beat in the powdered sugar, vanilla and salt until fluffy.
- Level the layers, saving the scraps. Frost between the layers, apply a thin crumb coat and chill 15 minutes.
- Cover with the remaining frosting and press crumbled cake scraps on top. Refrigerate until serving.
Notes
I hope this red velvet cake brings a little extra joy to your holiday table. If you bake it, please leave a comment and a star rating below and tell me how you decorated it. Happy baking and happy holidays, friends. Chef Amber
Free email bonus
30-Minute Meals
Loved this recipe? Get my collection of fast, family-favorite dinners, plus new seasonal recipes straight to your inbox.