
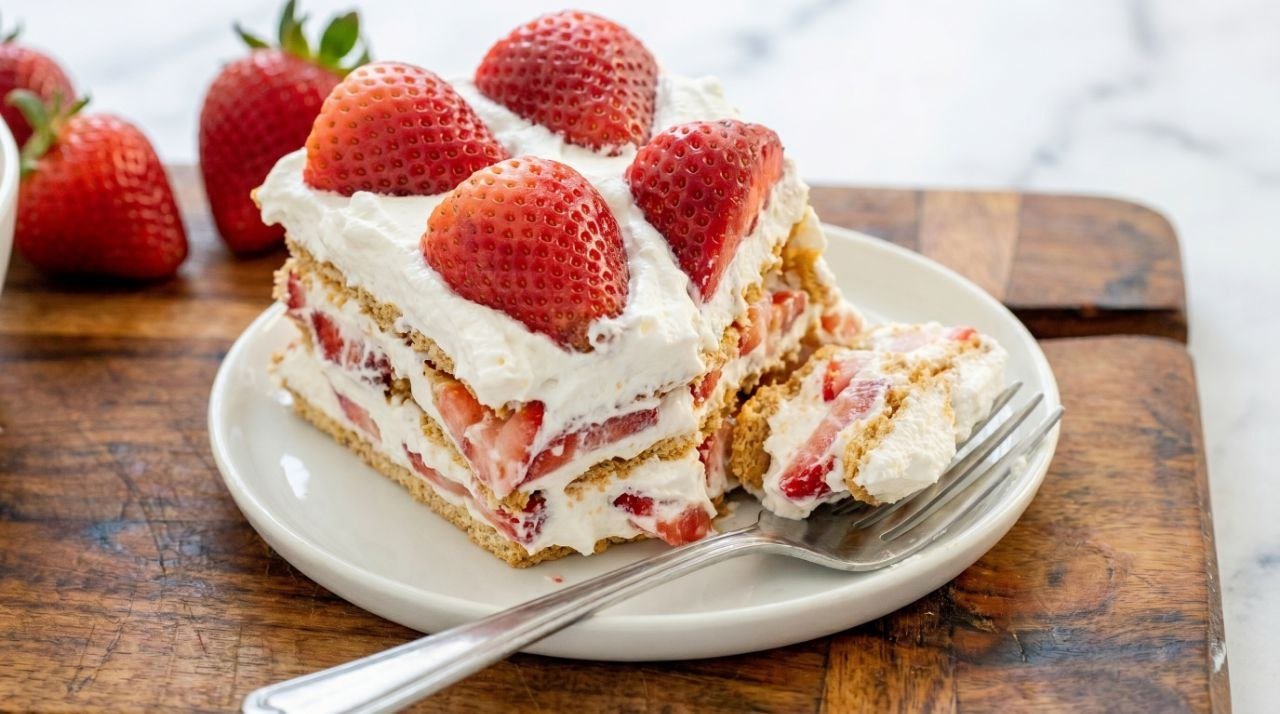
Strawberry Icebox Cake is a chilled, no-bake dessert built in alternating layers of whipped cream filling, fresh sliced strawberries, and crisp vanilla wafers that soften overnight in the refrigerator into something that slices and serves like a proper layered cake — cool, creamy, fruit-forward, and light enough to eat two slices without regret. The filling is white and glossy, the strawberry layers are vivid red, and the whole thing sets into a sliceable structure that holds its shape from the dish to the plate without falling apart. It takes roughly twenty minutes of active work, requires no oven, no piping bag, and no precision, yet it consistently looks impressive and tastes better the longer it sits in the refrigerator before serving.
What makes this version better than a standard two-ingredient icebox cake is the addition of cream cheese to the filling, which does two things at once that plain whipped topping cannot. First, it gives the filling enough structural body to hold the weight of the strawberry layers without softening and sliding during the chill period. Second, it introduces a mild, tangy dairy richness that balances the sweetness of the powdered sugar and the fruit, so the finished dessert tastes like something that was deliberately flavored rather than just assembled. Most icebox cake recipes use either whipped topping alone, which gives a light but floppy filling, or heavy cream alone, which gives richness but no tang. Combining softened cream cheese with whipped topping gives you both structure and flavor at the same time, and it is the step that separates a cake that slides on the plate from one that slices cleanly and stays layered until the last serving.
Why Strawberry Icebox Cake Works Every Time
The genius of the icebox cake format is that every component improves during the chill period rather than degrading, which means the dessert you pull from the refrigerator the next morning is genuinely better than the one you put in the night before. The vanilla wafers start crisp and gradually absorb moisture from both the cream filling and the strawberries, losing their snap and becoming tender and almost cake-like without ever turning mushy — and the timing of that transformation, which happens over four to eight hours, corresponds exactly with the moment the filling firms up and the strawberry layers release enough juice to perfume the cream without flooding it. The three components reach their best texture at the same moment, which is why an icebox cake that has been chilled overnight slices with a clean knife and holds its layers on the plate while one that has only chilled for an hour falls apart and tastes like separate ingredients that have not yet decided to become a dessert. Understanding this timeline is the whole technique — there is nothing complicated in the assembly, but respecting the chill window is what turns a grocery store ingredient list into something worth making again.
The Science Behind Strawberry Icebox Cake
The transformation that happens inside the refrigerator is driven by two simultaneous processes. The first is osmosis — the movement of water from a region of high concentration to a region of lower concentration across a semi-permeable membrane. Inside the refrigerator, the strawberries and the cream filling exist at different moisture concentrations, and water moves slowly from the wetter strawberry cells into the drier filling, softening the berries slightly while simultaneously flavoring the cream with fruit juice and natural fruit acids. That same osmotic process pulls moisture from the filling into the dry cookie layers, hydrating the starch granules in the vanilla wafers until they become pliable and cake-like. The result is a fully integrated dessert where every layer has exchanged moisture with its neighbor in a controlled and predictable way — which is exactly why the texture and flavor are so much better after an overnight rest than after one hour.
The filling stays stable because of the combined properties of the cream cheese and the whipped topping. Cream cheese is an emulsified dairy product that contains fat, protein, and a small amount of stabilizing gum — its fat content gives the filling richness and body, its protein network holds air when beaten, and its stabilizers prevent the fat and water phases from separating even after extended refrigeration. When cream cheese is beaten with powdered sugar and then folded together with whipped topping, the two dairy structures create a composite filling that is lighter than cream cheese alone but firmer than whipped topping alone. This hybrid consistency is stable enough to support the fruit layers for up to three days in the refrigerator without weeping, separating, or becoming grainy, which is why the dessert maintains its texture from the first slice to the last one two days later.
What Goes In
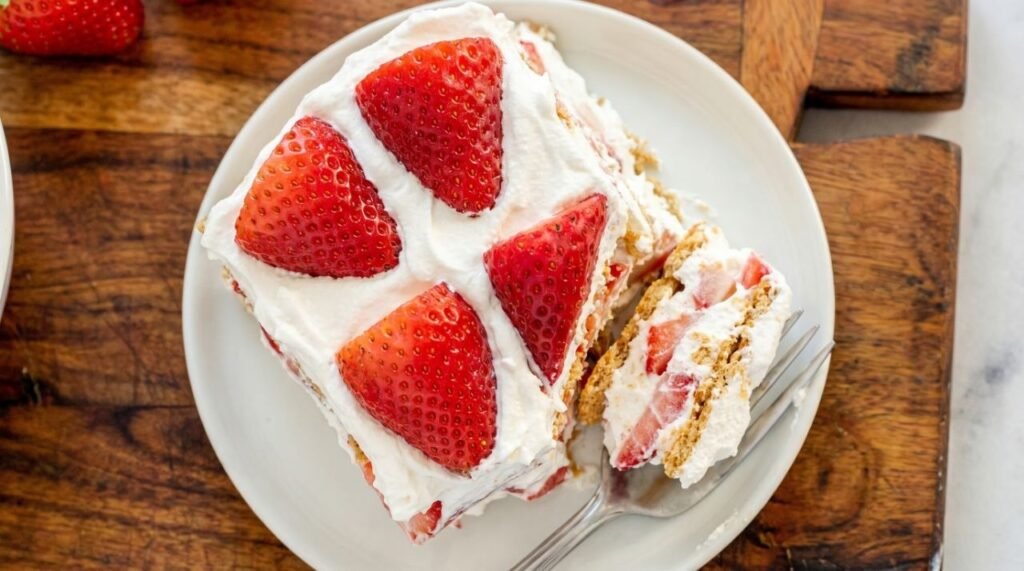
Six ingredients, twenty minutes of work, and the refrigerator does the rest.
2 pounds fresh strawberries, hulled and sliced thin.
8 oz full-fat block cream cheese, softened at room temperature for at least 45 minutes.
1 cup powdered sugar, sifted.
2 teaspoons pure vanilla extract.
16 oz whipped topping, fully thawed in the refrigerator overnight — not on the counter.
2 sleeves vanilla wafers — approximately 80 to 90 individual cookies.
Want to Mix It Up?
Replace vanilla wafers with graham crackers if you want a thicker, more structured base layer that takes longer to soften. Graham crackers have a denser starch network than vanilla wafers, which means they absorb moisture at roughly half the rate — the finished cake will be slightly firmer after four hours and will need the full overnight rest to reach the tender, cake-like texture that vanilla wafers develop more quickly.
Use chocolate graham crackers instead of plain if you want a strawberries-and-cream aesthetic with a darker, richer base. The cocoa in the chocolate crackers does not compete with the strawberry flavor — it actually amplifies it by providing a contrasting bitterness that makes the fruit taste brighter and more intense.
Add 1 teaspoon of fresh lemon zest to the cream filling before folding in the whipped topping for a citrus-forward version that cuts through the richness of the cream cheese. The lemon oils in the zest interact with the fruit acids in the strawberries and sharpen the flavor of the whole cake without introducing any detectable lemon flavor — the cake just tastes more awake and less flat.
Replace the strawberries with mixed berries — blueberries, raspberries, and sliced strawberries together — if you want a more complex flavor profile. Raspberries add tartness, blueberries add depth, and strawberries anchor the sweetness. The three berries also create a more visually interesting slice with layers of different colors rather than a single uniform red.
How to Make Strawberry Icebox Cake
Step 1 – Prepare the strawberries: Hull all the strawberries and slice them into even pieces no thicker than 1/4 inch — consistent thickness is critical here because thick slices create uneven gaps that cause the cake to lean or collapse during chilling. Spread the slices on a paper towel-lined sheet pan, lay another paper towel on top, and press gently to absorb the surface moisture from the cut edges. Let them sit for five minutes while you prepare the filling. Do not skip this step — it is the single most effective thing you can do to keep the filling stable.
Step 2 – Make the cream filling: In a large bowl, beat the fully softened cream cheese with the powdered sugar and vanilla extract using a hand mixer on medium speed for 2 to 3 minutes until the mixture is completely smooth, fluffy, and uniform with no visible lumps. If any lumps remain, the cream cheese was not soft enough — do not proceed until the texture is smooth, because lumps will not disappear once the whipped topping is added. Add the fully thawed whipped topping to the bowl and fold it in gently using a large silicone spatula, using slow, wide strokes that go down through the center and up the side of the bowl. Over-mixing deflates the whipped topping and turns the filling dense — fold only until the two mixtures are combined and the color is uniform.
Step 3 – Build the base layer: Spread a thin, even layer of the cream filling across the bottom of a 9×13-inch baking dish — approximately 1/2 cup is enough to anchor the first cookie layer without creating a pool of cream that will make the cookies slide. This base layer is structural: it prevents the cookies from shifting during the rest of the assembly and ensures the bottom layer softens evenly because it has cream contact on both sides rather than just one. Arrange the vanilla wafers in a single layer over the cream, pressing them close together and breaking wafers to fill gaps at the edges.
Step 4 – Layer the filling and berries: Spread a generous, even layer of the cream filling over the cookies, using the spatula to push the cream into all the gaps between the wafers so there are no air pockets. Lay a single layer of the dried strawberry slices over the cream, placing them close together so the fruit is evenly distributed across the entire surface rather than clustered in the center. Repeat the sequence — cookies, cream, strawberries — until you have used all the ingredients, finishing with a layer of cream on top. The final cream layer should be smooth enough to serve as the visible surface of the cake.
Step 5 – Chill and serve: Cover the dish tightly with plastic wrap pressed directly against the surface of the top cream layer — this prevents a skin from forming and keeps the cream from absorbing any refrigerator odors. Refrigerate for a minimum of 6 hours, though overnight is strongly recommended. When ready to serve, remove the plastic wrap, decorate the top with a few fresh strawberry slices if desired, and cut with a sharp knife wiped clean between each slice. The cake keeps covered in the refrigerator for up to 3 days, though the cookie layers will continue to soften.
3 Mistakes That Ruin Strawberry Icebox Cake
Using cream cheese straight from the refrigerator: Cold cream cheese has a rigid fat structure that does not break down under the paddle of a hand mixer — it smears around the bowl and leaves small, dense lumps that persist through the entire mixing process and are still visible in the finished filling after chilling. Those lumps are pockets of unmixed dairy fat that never integrated with the sugar and whipped topping, and they create a grainy texture on the palate rather than the smooth, creamy consistency the dessert is built on. The solution is simple: remove the cream cheese from the refrigerator 45 to 60 minutes before making the filling and let it sit on the counter until it yields completely to finger pressure.
Not chilling the dessert long enough: The icebox cake format requires time the way a baked cake requires heat — it is the non-negotiable element that drives the transformation from assembled layers to a cohesive, sliceable dessert. After only 2 hours, the cookies are still mostly crisp, the filling has not fully set, and the strawberry moisture has not distributed evenly through the cream. The result is a dessert that falls apart on the spatula and tastes like its components separately rather than as a unified thing. After 6 hours, the cookies are softened but still structured, the cream is firm, and the flavors have merged. After 8 to 12 hours, the dessert is at its best. Rushing the chill time is the most common reason this recipe disappoints.
Layering wet strawberries directly on the cream: The juice on the surface of a freshly cut strawberry slice releases immediately into the cream the moment they touch, creating a zone of liquid between the cream and the fruit that prevents the layers from bonding properly during chilling. That liquid zone never fully integrates — it stays as a loose, wet interface that causes the strawberry layer to slide when the cake is cut and pooled juice to appear on the plate around each slice. Patting the strawberries dry before layering eliminates this problem entirely. The remaining moisture inside the berry cells still releases slowly during the overnight chill, which is what flavors the cream — but it releases at a rate the filling can absorb rather than flooding the surface at once.
What to Serve With Strawberry Icebox Cake
Strawberry Icebox Cake is a natural closer for any casual summer dinner, and it works best when the main course is something savory and warm that contrasts with the cold, creamy sweetness of the dessert. Our Easy Lemon Garlic Chicken Thighs make an ideal pairing — the bright citrus and herb flavors of the chicken set up the sweetness of the strawberries without competing with it, and the transition from a warm savory plate to a cold creamy dessert is one of the most satisfying contrasts at a summer table. If you want to extend the dessert course further, our Easy Lemon Bars serve beautifully alongside the icebox cake on the same platter — the tart, shortbread-based bar provides a firm, citrus-sharp counterpoint to the soft and creamy strawberry cake.

Easy Strawberry Icebox Cake
Ingredients
Method
- How to Make Strawberry Icebox Cake
- Step 1 – Prepare the strawberries: Hull all the strawberries and slice them into even pieces no thicker than 1/4 inch — consistent thickness is critical here because thick slices create uneven gaps that cause the cake to lean or collapse during chilling. Spread the slices on a paper towel-lined sheet pan, lay another paper towel on top, and press gently to absorb the surface moisture from the cut edges. Let them sit for five minutes while you prepare the filling. Do not skip this step — it is the single most effective thing you can do to keep the filling stable.
- Step 2 – Make the cream filling: In a large bowl, beat the fully softened cream cheese with the powdered sugar and vanilla extract using a hand mixer on medium speed for 2 to 3 minutes until the mixture is completely smooth, fluffy, and uniform with no visible lumps. If any lumps remain, the cream cheese was not soft enough — do not proceed until the texture is smooth, because lumps will not disappear once the whipped topping is added. Add the fully thawed whipped topping to the bowl and fold it in gently using a large silicone spatula, using slow, wide strokes that go down through the center and up the side of the bowl. Over-mixing deflates the whipped topping and turns the filling dense — fold only until the two mixtures are combined and the color is uniform.
- Step 3 – Build the base layer: Spread a thin, even layer of the cream filling across the bottom of a 9×13-inch baking dish — approximately 1/2 cup is enough to anchor the first cookie layer without creating a pool of cream that will make the cookies slide. This base layer is structural: it prevents the cookies from shifting during the rest of the assembly and ensures the bottom layer softens evenly because it has cream contact on both sides rather than just one. Arrange the vanilla wafers in a single layer over the cream, pressing them close together and breaking wafers to fill gaps at the edges.
- Step 4 – Layer the filling and berries: Spread a generous, even layer of the cream filling over the cookies, using the spatula to push the cream into all the gaps between the wafers so there are no air pockets. Lay a single layer of the dried strawberry slices over the cream, placing them close together so the fruit is evenly distributed across the entire surface rather than clustered in the center. Repeat the sequence — cookies, cream, strawberries — until you have used all the ingredients, finishing with a layer of cream on top. The final cream layer should be smooth enough to serve as the visible surface of the cake.
- Step 5 – Chill and serve: Cover the dish tightly with plastic wrap pressed directly against the surface of the top cream layer — this prevents a skin from forming and keeps the cream from absorbing any refrigerator odors. Refrigerate for a minimum of 6 hours, though overnight is strongly recommended. When ready to serve, remove the plastic wrap, decorate the top with a few fresh strawberry slices if desired, and cut with a sharp knife wiped clean between each slice. The cake keeps covered in the refrigerator for up to 3 days, though the cookie layers will continue to soften.
Notes
