
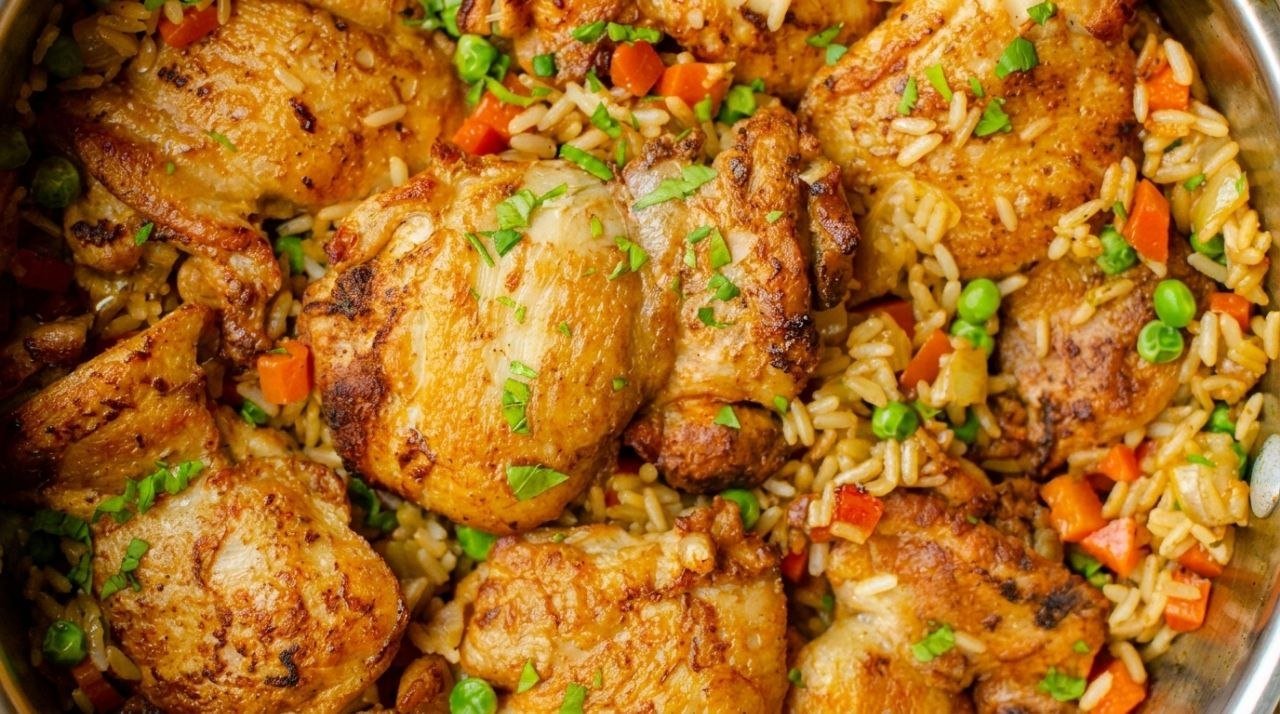
One Pot Chicken and Rice is the kind of dinner that earns its place on a weekly rotation not just because it is simple, but because it is genuinely satisfying in a way that few other weeknight meals manage — the chicken thighs are seared until the skin turns golden and renders its fat into the pot, the rice is toasted in that same fat before any liquid is added, the broth and aromatics are layered in, and everything finishes together in the oven so the rice absorbs the chicken drippings, the garlic and onion flavor, and the saffron or spice of your choice all the way through every grain. The finished dish comes out of the oven with chicken that is tender and pulling away from the bone, a crisp base of slightly crust-edged rice underneath, and a fragrant steam that fills the kitchen when the lid is lifted. It is the kind of dinner that makes the whole house smell like something important is happening.
What separates a truly great one pot chicken and rice from a mediocre version is the searing step that many home cooks rush or skip entirely. Chicken thighs placed into a pot with raw rice and cold broth and cooked from the beginning without any searing produce pale, soft-skinned chicken and bland, starchy rice that taste like they were boiled together rather than roasted. Searing the chicken first in a hot, dry Dutch oven until the skin is deeply golden does two things that cannot be replicated any other way: it renders the subcutaneous fat out of the skin so the finished chicken is not greasy, and it leaves behind a layer of browned, caramelized drippings on the bottom of the pot that dissolves into the rice as it cooks. That layer of fond is the flavor engine of the entire dish — everything that tastes deep and savory and roasted about the finished rice traces back to those first minutes of searing.
Why One Pot Chicken and Rice Works Every Time
The reliability of this recipe is built into its sequence. The chicken sears first to develop flavor and render fat, the aromatics cook in that fat to soften and sweeten, the rice toasts briefly in the remaining fat to coat each grain and protect it from turning gummy, and the broth is added hot so the temperature inside the pot does not drop dramatically when the liquid goes in. Each step builds on the last, and the oven finish rather than stovetop simmer is what makes the result so consistent — the even, enclosed heat of the oven cooks the rice from all sides simultaneously rather than from the bottom only, which prevents scorching, allows even absorption, and gives the chicken skin time to firm back up into a proper crust on top rather than going limp under steam.
The Science Behind One Pot Chicken and Rice
The transformation of raw rice into fully cooked, separate, fluffy grains depends on starch gelatinization — the process by which the tightly packed starch granules inside each grain absorb water and heat, swell until their outer membrane ruptures, and release long-chain amylose and amylopectin molecules into the surrounding liquid. When this happens gradually and evenly inside a covered pot of hot broth, the starch molecules hydrate fully and the rice grain expands into a tender, distinct piece with a slightly sticky exterior. The brief toasting step before the liquid is added coats the outer surface of each grain in a thin layer of cooked starch and fat, which slows initial water absorption, keeps the grains from clumping, and gives the finished rice a more defined, separate texture than untoasted rice cooked in the same ratio of liquid would produce.
The deep flavor of the chicken drippings that infuse the rice during cooking comes directly from the Maillard reaction that occurs on the chicken skin during searing. When the skin of the chicken thigh contacts the hot, dry surface of the Dutch oven, the proteins and natural sugars in the skin react above 280 degrees Fahrenheit and produce a dense layer of aromatic compounds — hundreds of them — that coat the bottom of the pot as a dark, glossy fond. When the broth is added and the rice begins to cook, that fond dissolves into the liquid and distributes through every grain of rice as it absorbs moisture. This is why rice cooked in the drippings of properly seared chicken tastes fundamentally more savory and complex than rice cooked in plain broth with no searing step, even when the same broth and seasonings are used in both.
What Goes In
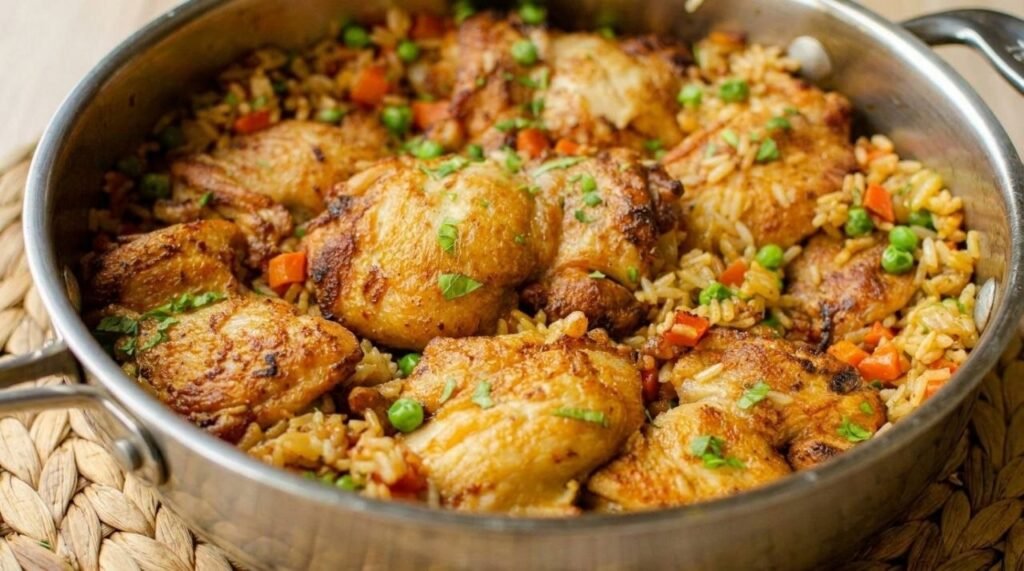
One Dutch oven, one rack of pantry spices, and an hour of mostly hands-off cooking.
4 bone-in, skin-on chicken thighs, about 2 lbs total.
1 1/2 cups long-grain white rice, uncooked.
2 1/2 cups chicken broth, heated.
1 medium yellow onion, finely diced.
5 cloves garlic, minced.
1 tablespoon olive oil.
1 teaspoon smoked paprika.
1/2 teaspoon ground cumin.
1/2 teaspoon ground turmeric.
1 teaspoon kosher salt, plus more to taste.
1/2 teaspoon black pepper.
Fresh parsley, chopped, for garnish.
Want to Mix It Up?
Add a pinch of saffron bloomed in two tablespoons of warm water to the broth if you want the rice to take on a golden color and a delicate floral depth that elevates the dish from straightforward comfort food to something with a more Mediterranean or Persian character. Saffron is potent — a small pinch is enough to color and flavor the entire pot.
Stir in a cup of frozen peas and a handful of fresh dill in the last five minutes of oven time if you want the dish to feel lighter and more spring-like. The peas add sweetness and color, and the dill brings an herbal brightness that contrasts the richness of the chicken drippings in the rice.
Use boneless skinless chicken thighs instead of bone-in for a faster version that still delivers moist, flavorful chicken. The trade-off is that boneless thighs do not contribute as much collagen or dripping depth to the rice as bone-in pieces do, so compensate by using a more flavorful homemade or roasted broth rather than a plain commercial one.
Add one can of diced fire-roasted tomatoes along with the broth if you want a slightly richer, more robust one-pot meal closer in spirit to arroz con pollo. The tomatoes add acidity and body to the cooking liquid that deepens the rice color and gives the whole dish a more complex, stew-like quality without any additional technique.
How to Make One Pot Chicken and Rice
Step 1 – Season and sear the chicken: Pat the chicken thighs completely dry on all surfaces and season generously with salt, pepper, and the smoked paprika on both sides. Heat the olive oil in a large Dutch oven or heavy oven-safe pot over medium-high heat until the oil shimmers. Place the chicken thighs skin-side down and do not move them — let them sear undisturbed for 6 to 8 minutes until the skin is deeply golden, crisp, and releases easily from the pot without sticking. Flip and sear the underside for 3 minutes more, then transfer to a plate. The chicken is not cooked through at this point and is not meant to be — it will finish in the oven. What matters here is the layer of caramelized drippings left on the bottom of the pot.
Step 2 – Cook the aromatics: Reduce the heat to medium. Pour off all but one tablespoon of the rendered chicken fat — enough to cook the aromatics, but not so much that the rice will be greasy. Add the diced onion and cook, stirring occasionally and scraping up the browned bits from the bottom of the pot, for 4 to 5 minutes until softened and translucent. Add the garlic, cumin, and turmeric and stir for 60 seconds until fragrant. The spices should smell toasted and vivid rather than raw — that brief contact with the hot fat blooms the fat-soluble flavor compounds in the spices and distributes them through the base of the dish far more effectively than adding them with the liquid later would.
Step 3 – Toast the rice: Add the uncooked rice directly to the pot and stir it into the spiced fat and onion mixture. Toast for 2 minutes, stirring constantly, until the rice grains look slightly translucent at the edges and smell faintly nutty. Every grain should be coated in fat and spice before the liquid is added. This step is short but not optional — it is what gives the finished rice its defined, separate texture and its more complex flavor compared to rice that was simply added raw with the broth.
Step 4 – Add the broth and bake: Pour the hot broth over the toasted rice and stir once to distribute everything evenly. Taste the liquid for seasoning and adjust with salt if needed — the rice will absorb all of it, so the broth should taste slightly more seasoned than you want the finished dish to be. Nestle the seared chicken thighs on top of the rice skin-side up, pressing them in gently so they sit partially submerged but with the skin above the liquid line. Cover the pot with its lid and transfer to a preheated 375 degree Fahrenheit oven for 35 to 40 minutes until the rice has absorbed all the liquid and the chicken registers 165 degrees Fahrenheit internally.
Step 5 – Rest, uncover, and serve: Remove the pot from the oven and let it rest covered for 5 minutes — this is the moment when the steam inside the pot finishes cooking any remaining liquid into the rice and the grains firm up slightly into their final texture. Uncover, fluff the rice gently with a fork around the edges of the chicken, and scatter fresh parsley over the top. Serve directly from the pot at the table, which is both practical and considerably more satisfying than plating individually.
3 Mistakes That Ruin One Pot Chicken and Rice
Skipping the sear or rushing it: Pale, unseared chicken placed directly into the pot with rice and broth produces a dish that is cooked through but lacks any of the deep, savory character that makes one pot chicken and rice worth making. The sear is not primarily about coloring the skin for appearance — it is about developing the fond, rendering the fat, and setting up the flavor foundation that every grain of rice in the pot will absorb over the next forty minutes. Rushing the sear by using insufficient heat or moving the chicken too early produces the same result as skipping it: a technically correct but deeply underwhelming dinner.
Lifting the lid during oven cooking: Once the pot is covered and in the oven, the steam inside creates a pressurized, even cooking environment that cooks the rice uniformly from top to bottom. Every time the lid is lifted, that steam escapes and has to be rebuilt from scratch, which throws off the absorption timing and can leave sections of rice undercooked or unevenly hydrated. Trust the recipe timing, resist the urge to check, and lift the lid only after the minimum suggested time has passed.
Using the wrong rice variety: Long-grain white rice is the correct choice for this recipe because its lower starch content produces distinct, separate grains after absorption rather than a sticky or mushy mass. Short-grain rice, sushi rice, or arborio will release too much starch into the broth and turn the dish into something closer to risotto in texture. Brown rice requires significantly more liquid and time and will not be cooked through by the time the chicken is done. Basmati is an excellent substitute for long-grain white rice and produces a slightly more aromatic result with the same technique.
What to Serve With One Pot Chicken and Rice
One Pot Chicken and Rice is a complete, self-sufficient dinner that needs very little alongside it, but a simple green salad with lemon vinaigrette, a bowl of plain yogurt with cucumber and mint, or a plate of warm flatbread all add freshness and contrast without competing with the richness of the dish. For a full dinner menu, start the meal with our Air Fryer Chicken Bites as a fast, crowd-pleasing appetizer that fits the same savory, spiced flavor direction. To close the meal on a bright, cool note that contrasts the warm, hearty main, our No Bake Raspberry Cheesecake is the right dessert — its cold, tangy, creamy character is precisely what a rich and savory rice dinner leaves you ready for.

Easy One Pot Chicken and Rice
Ingredients
Method
- How to Make One Pot Chicken and Rice
- Step 1 – Season and sear the chicken: Pat the chicken thighs completely dry on all surfaces and season generously with salt, pepper, and the smoked paprika on both sides. Heat the olive oil in a large Dutch oven or heavy oven-safe pot over medium-high heat until the oil shimmers. Place the chicken thighs skin-side down and do not move them — let them sear undisturbed for 6 to 8 minutes until the skin is deeply golden, crisp, and releases easily from the pot without sticking. Flip and sear the underside for 3 minutes more, then transfer to a plate. The chicken is not cooked through at this point and is not meant to be — it will finish in the oven. What matters here is the layer of caramelized drippings left on the bottom of the pot.
- Step 2 – Cook the aromatics: Reduce the heat to medium. Pour off all but one tablespoon of the rendered chicken fat — enough to cook the aromatics, but not so much that the rice will be greasy. Add the diced onion and cook, stirring occasionally and scraping up the browned bits from the bottom of the pot, for 4 to 5 minutes until softened and translucent. Add the garlic, cumin, and turmeric and stir for 60 seconds until fragrant. The spices should smell toasted and vivid rather than raw — that brief contact with the hot fat blooms the fat-soluble flavor compounds in the spices and distributes them through the base of the dish far more effectively than adding them with the liquid later would.
- Step 3 – Toast the rice: Add the uncooked rice directly to the pot and stir it into the spiced fat and onion mixture. Toast for 2 minutes, stirring constantly, until the rice grains look slightly translucent at the edges and smell faintly nutty. Every grain should be coated in fat and spice before the liquid is added. This step is short but not optional — it is what gives the finished rice its defined, separate texture and its more complex flavor compared to rice that was simply added raw with the broth.
- Step 4 – Add the broth and bake: Pour the hot broth over the toasted rice and stir once to distribute everything evenly. Taste the liquid for seasoning and adjust with salt if needed — the rice will absorb all of it, so the broth should taste slightly more seasoned than you want the finished dish to be. Nestle the seared chicken thighs on top of the rice skin-side up, pressing them in gently so they sit partially submerged but with the skin above the liquid line. Cover the pot with its lid and transfer to a preheated 375 degree Fahrenheit oven for 35 to 40 minutes until the rice has absorbed all the liquid and the chicken registers 165 degrees Fahrenheit internally.
- Step 5 – Rest, uncover, and serve: Remove the pot from the oven and let it rest covered for 5 minutes — this is the moment when the steam inside the pot finishes cooking any remaining liquid into the rice and the grains firm up slightly into their final texture. Uncover, fluff the rice gently with a fork around the edges of the chicken, and scatter fresh parsley over the top. Serve directly from the pot at the table, which is both practical and considerably more satisfying than plating individually.
Notes
